|
Pictures are hyperlinked, please click on picture to see
larger version of it
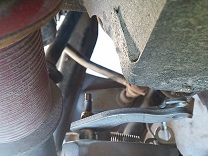
During conversion from drums to disks, the quick way out was to install line
lock inline to the rear calipers. problem with that is that you have to pump the
pedal to create pressure and lock the line with valve so that the calipers keep
pressure on the disk when its park. Second problem is if the valve does have a
small leak pressure in the line will release thus disengaging pressure on the
rear disk. Its ok if you leave it in gear but if its out of gear the car will
roll down the hill.
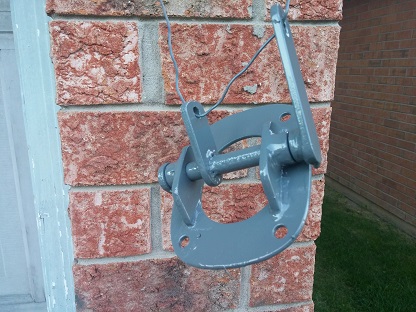
 Looked at the Wilwood mechanical Spot Calipers but their mounting was just
so odd and would have produced too much rattle not just from the mount option
but from the way the caliper was designed and build. Other thing was just the
way the cable was attaching to the caliper. It would not have been too terribly
bad if the caliper was mounted to a stationary point that had just sliding
option to it, but since it was to be mounted on spindle. Cable adjustment would
had been a nightmare. Looked at the Wilwood mechanical Spot Calipers but their mounting was just
so odd and would have produced too much rattle not just from the mount option
but from the way the caliper was designed and build. Other thing was just the
way the cable was attaching to the caliper. It would not have been too terribly
bad if the caliper was mounted to a stationary point that had just sliding
option to it, but since it was to be mounted on spindle. Cable adjustment would
had been a nightmare.
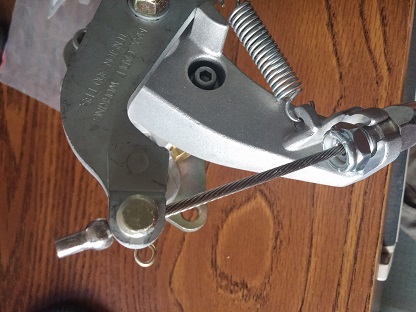
Current option is again from Wilwood but going with their MC-4 series
calipers. All of the deficiencies from the Spot calipers seems like had been
resolved though not too sure about the huge adjustment screw in the back of the
caliper.
Now that the engine is out in the shop for teardown and overall the car is free
to be further stripped down and that it will not be moving its time to rip down
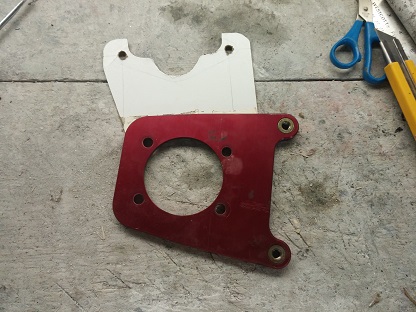
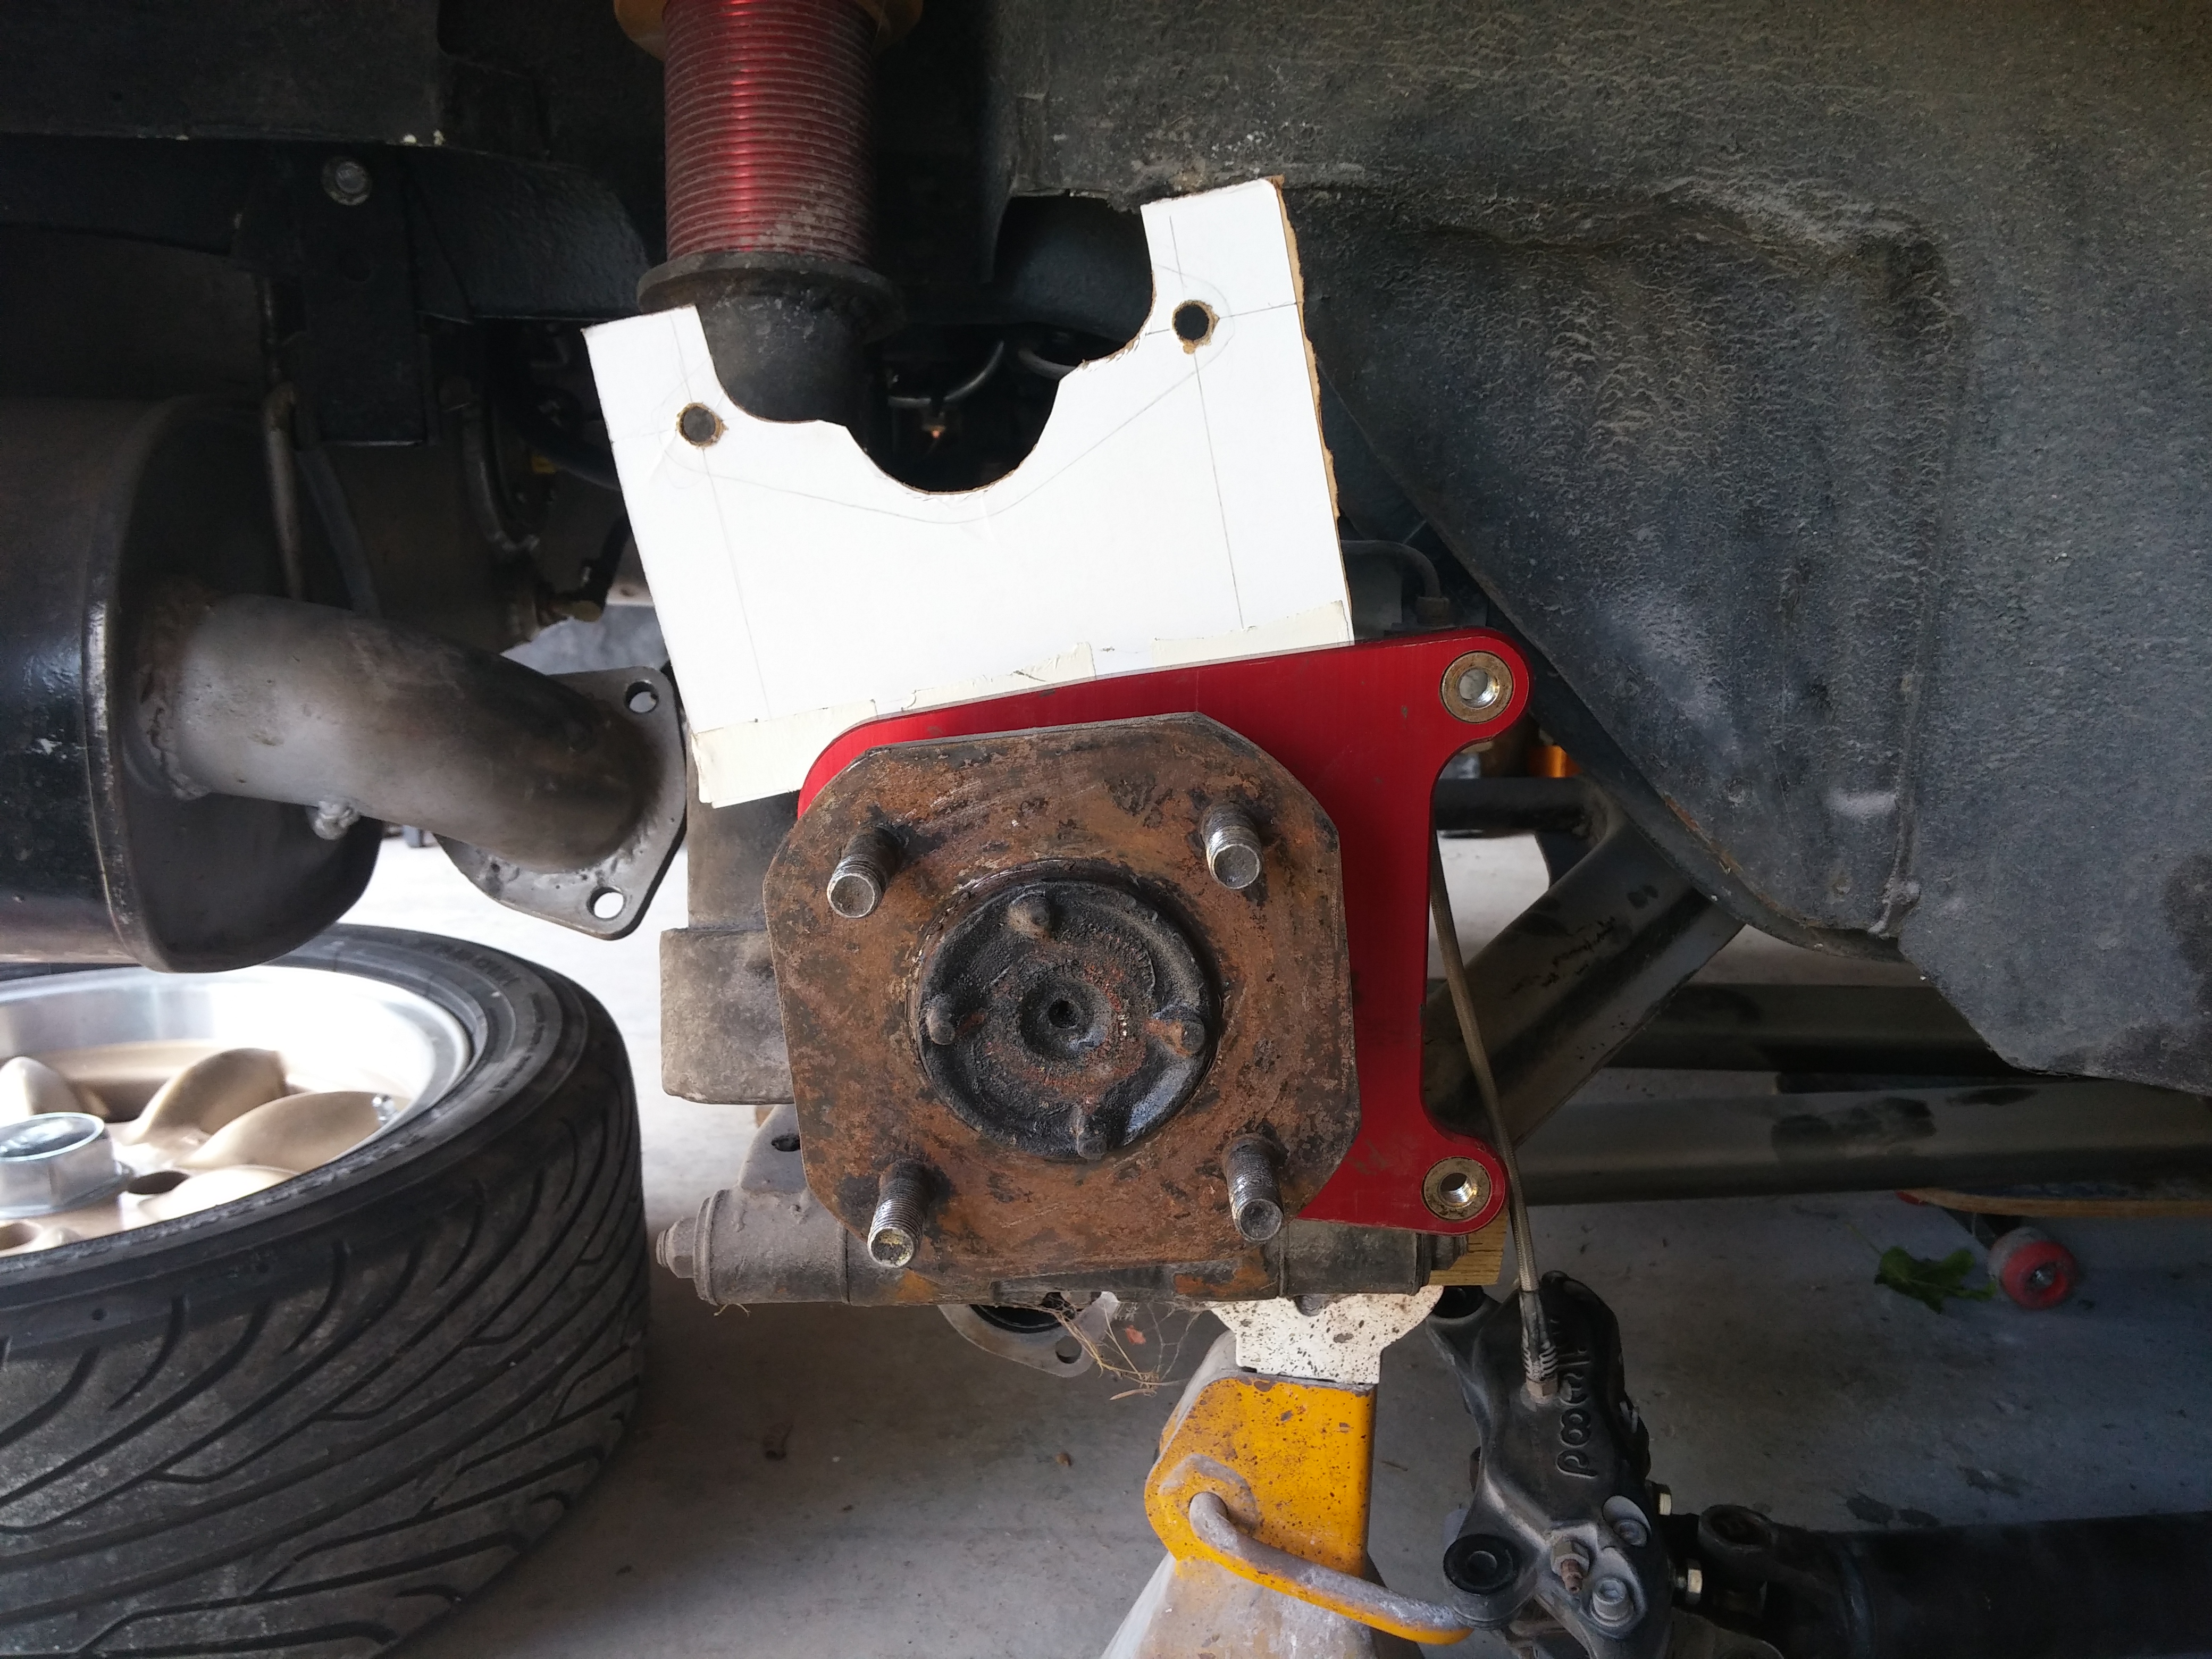
into the brake adapter modification. After making careful cutout around
the MC-4 caliper mounting area and making sure body of the caliper clears the
caliper was mounted on to the cardboard and a double sided tape was placed on
mating surface between cardboard and the current adapter plate. with a 1/8"
filler rod as spacer the assembly was placed on top of the caliper and aligned
in a way that the adjusting bold in back of the caliper would clear the shock
tower the cardboard was glued onto the adapter plate. In
this position the up
and down motion of the wheel and hub assembly will clear the body of the car and still have clearance for the coilovers and quite possibly be able to work with OE spring setup.
Now the hard part, as the adapter plate is mounted with 4 bolts to the hub
assembly and the only way to retrace the layout of the original plate and the
new addition is to completely disassemble the half shaft and remove the stub
axle from the carrier. Well it has to be done so off goes everything. Now here
is a bit of the sucky part. Off set for the hydraulic caliper is 3/16"
different then the parking caliper which has to be pushed inward forcing to
adapter plate to be made of thicker plate. Original plate that ArizonaZ came as
is 3/8 in thickness the new one will have to be made out of 5/16 or 3/4" thick
material making it thick and will require more machining and also making
material bit more expensive.
After some trial and error and lots measuring, the plate will need to be
made out of 1" thick plate machines on both sides to get all of the off
sets in right spots and have enough material to hold up both of the calipers.
Next is to make up CAD drawing and off to machine shop and have them cut.
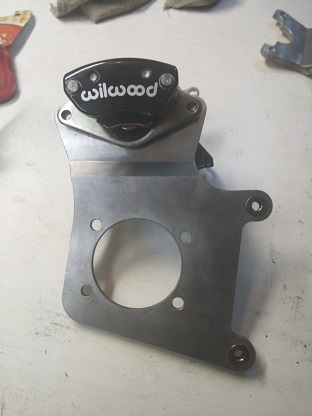
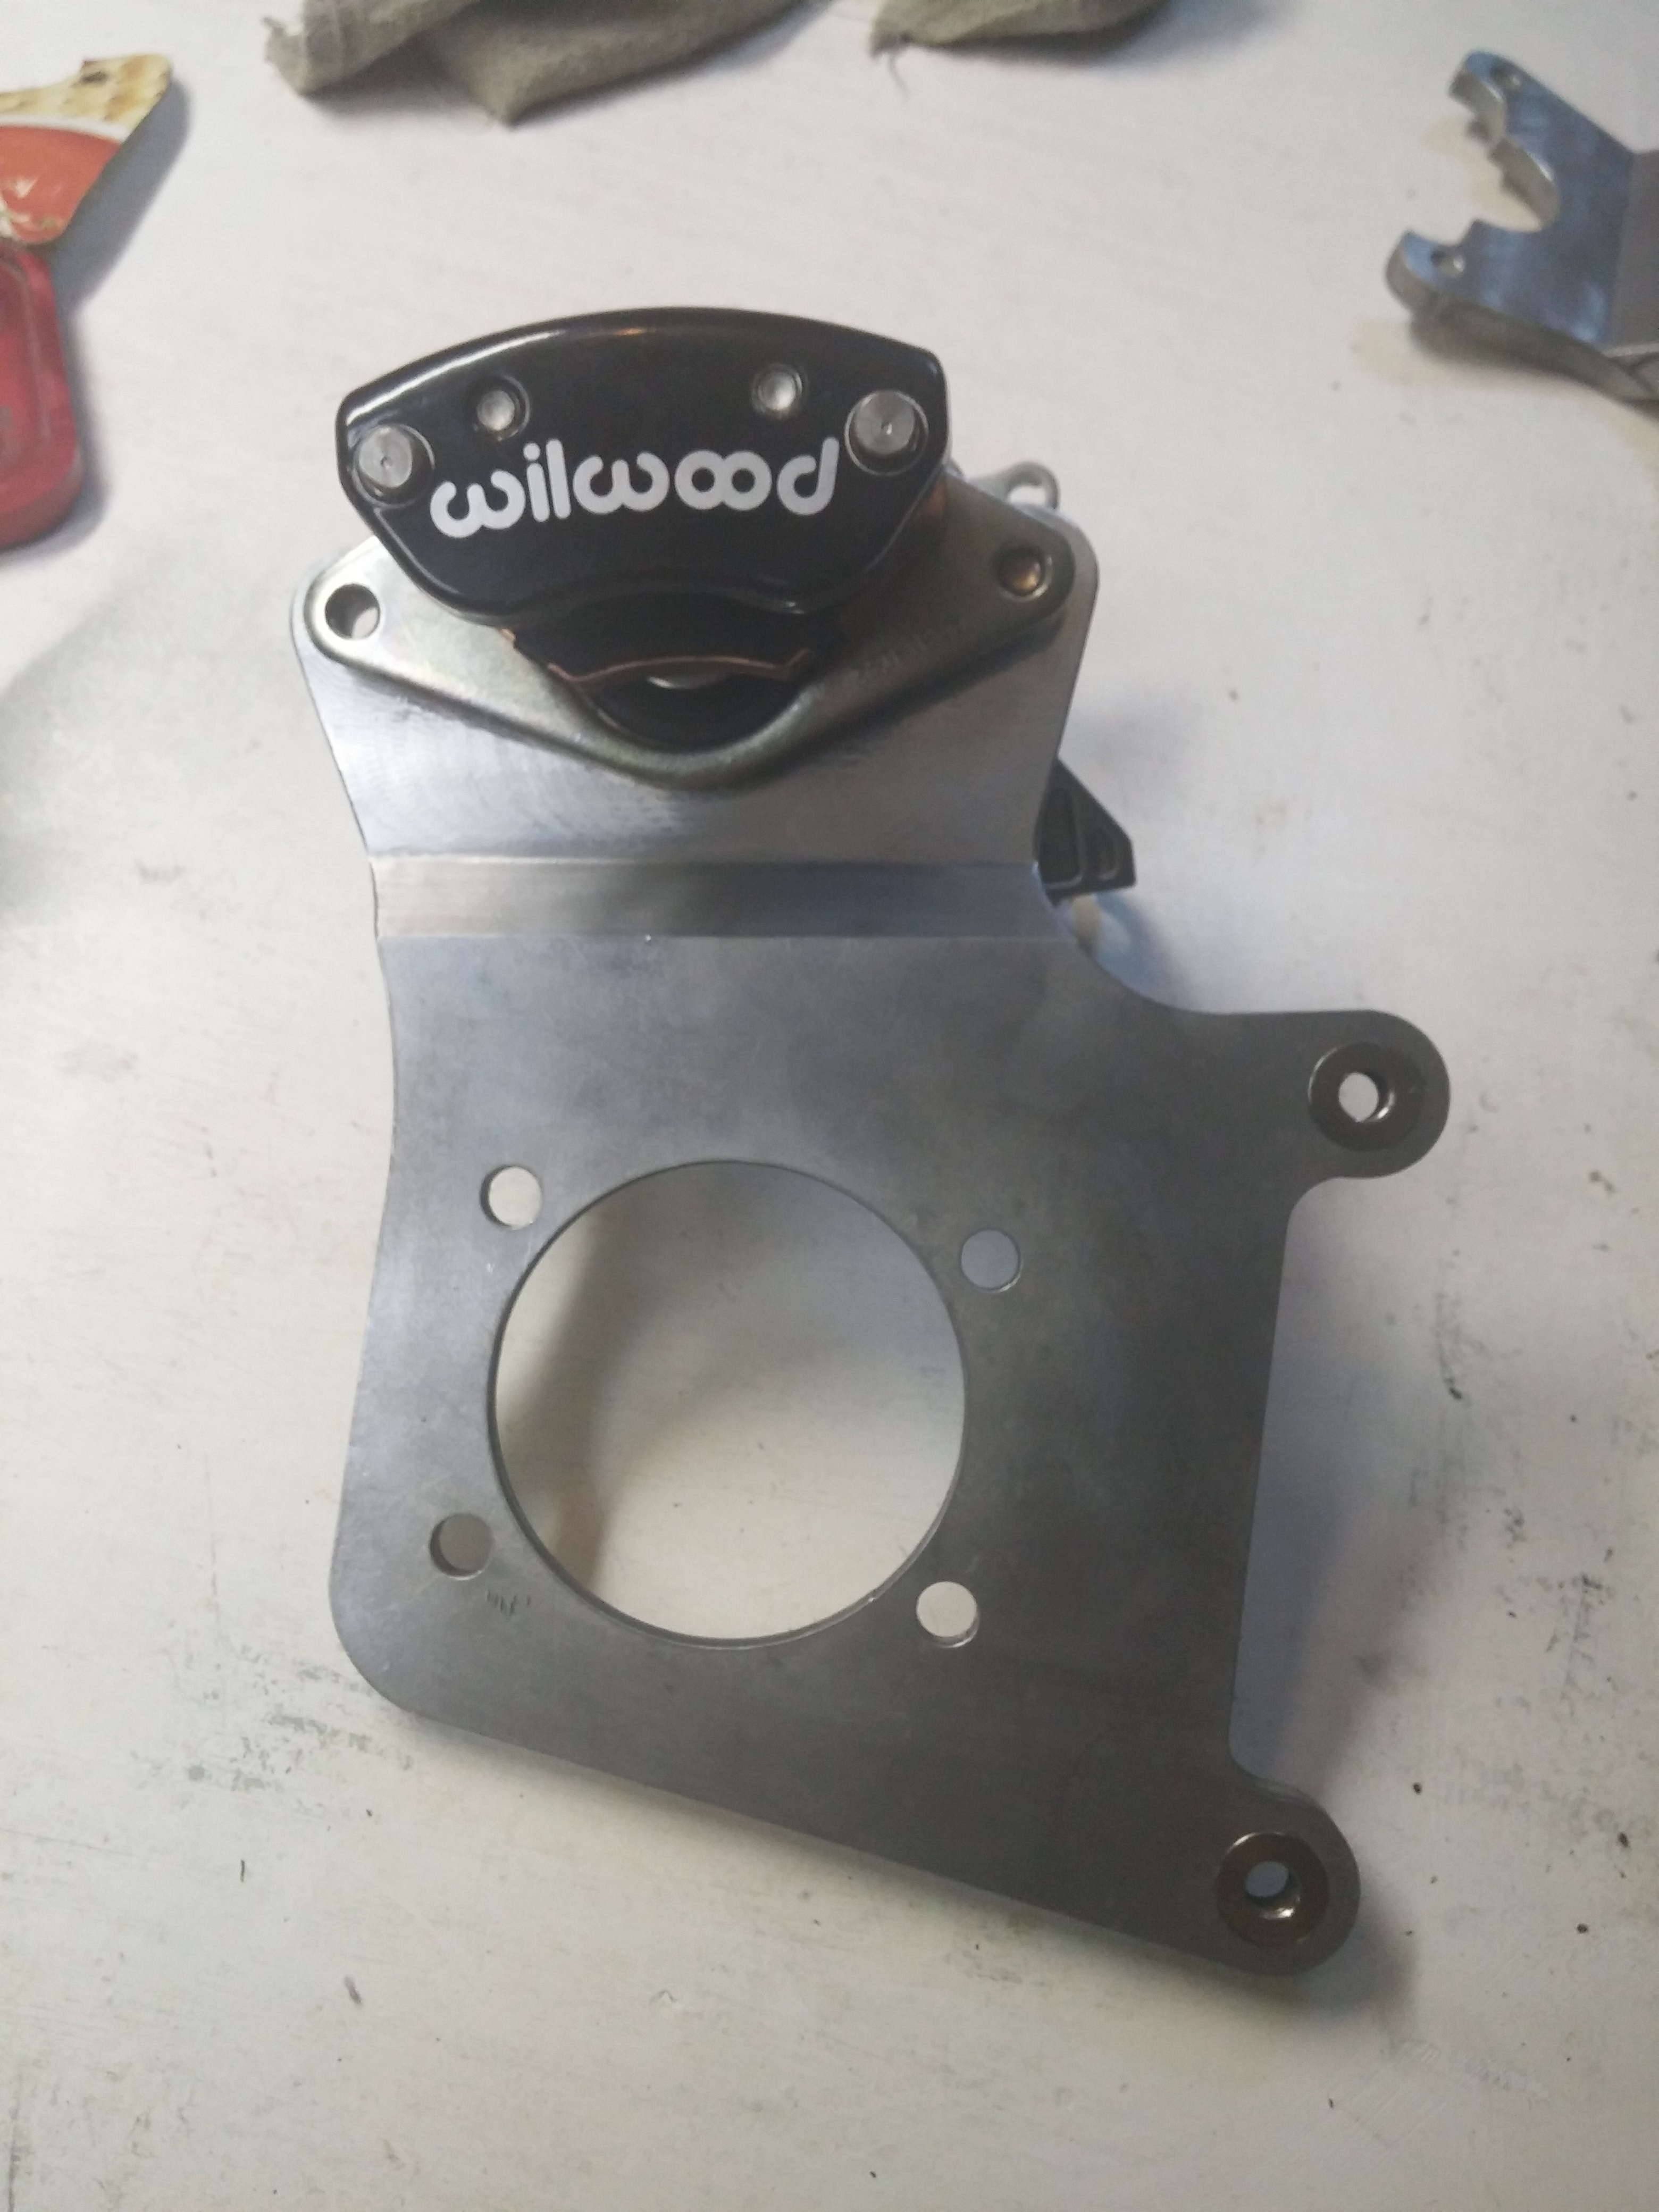
This is the shape of the adapter
plate
with a side profile that
resembles a Z fold. reason for it is due to offset and mounting configurations
of the calipers
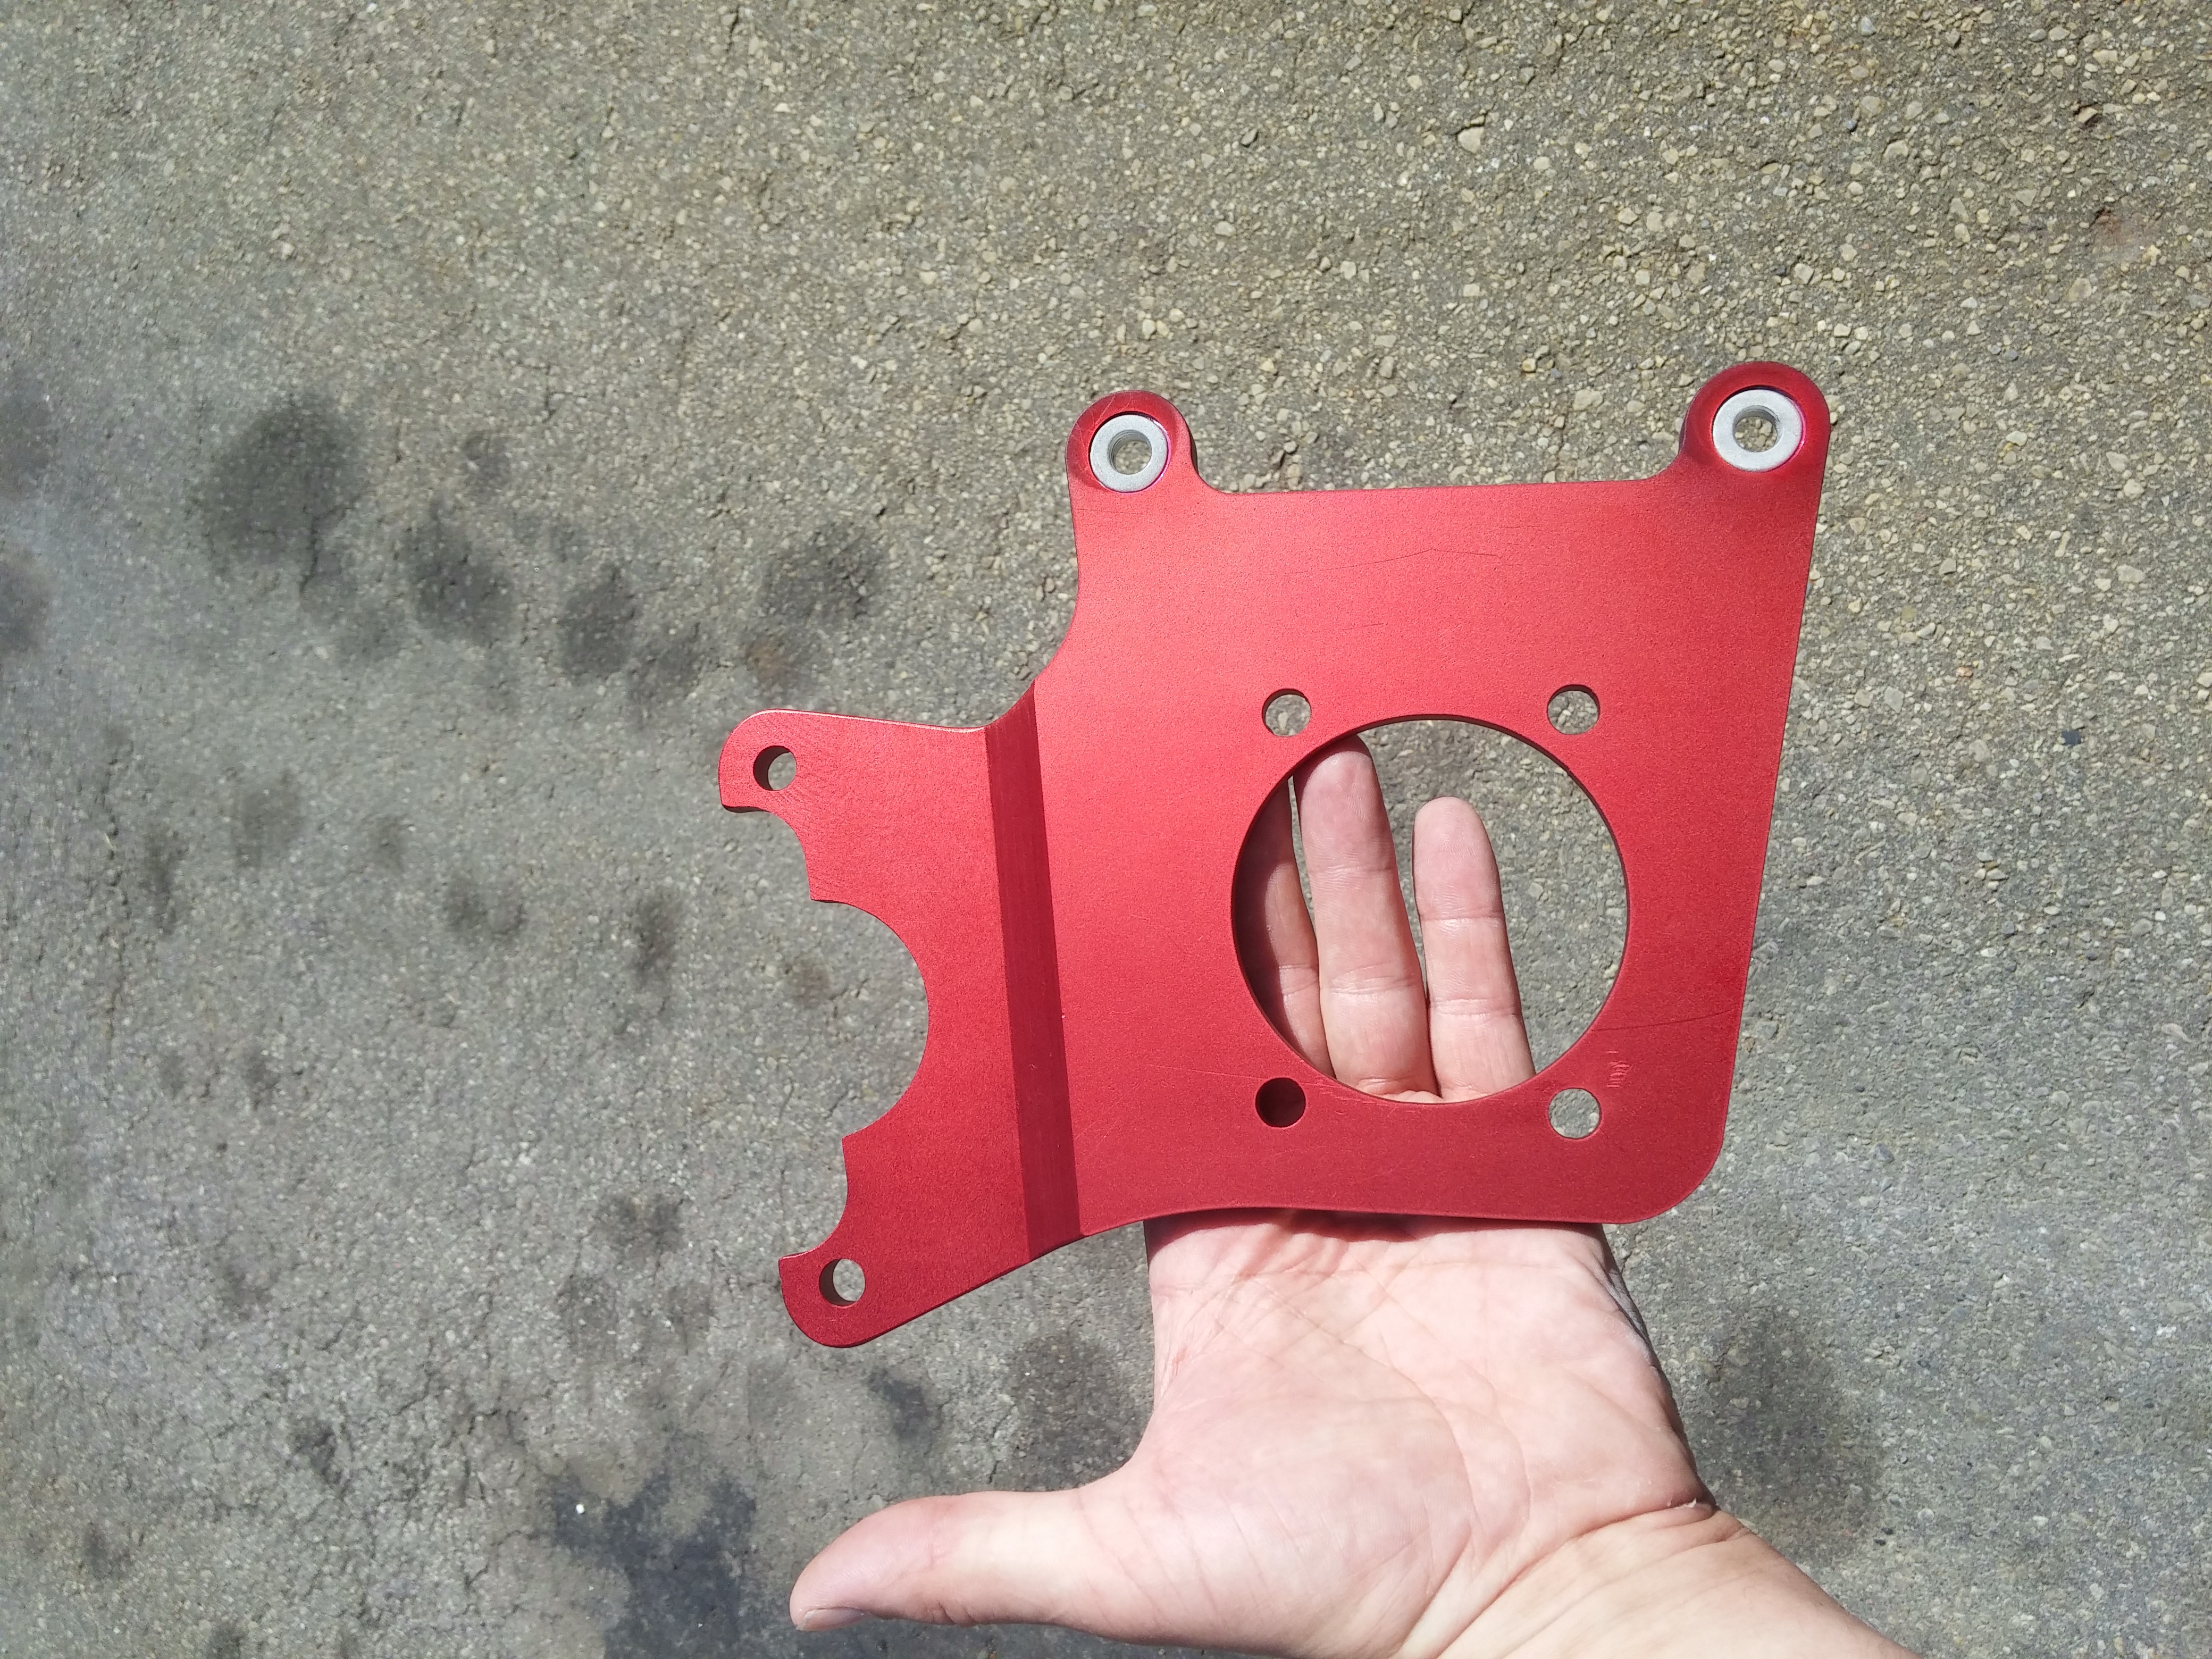
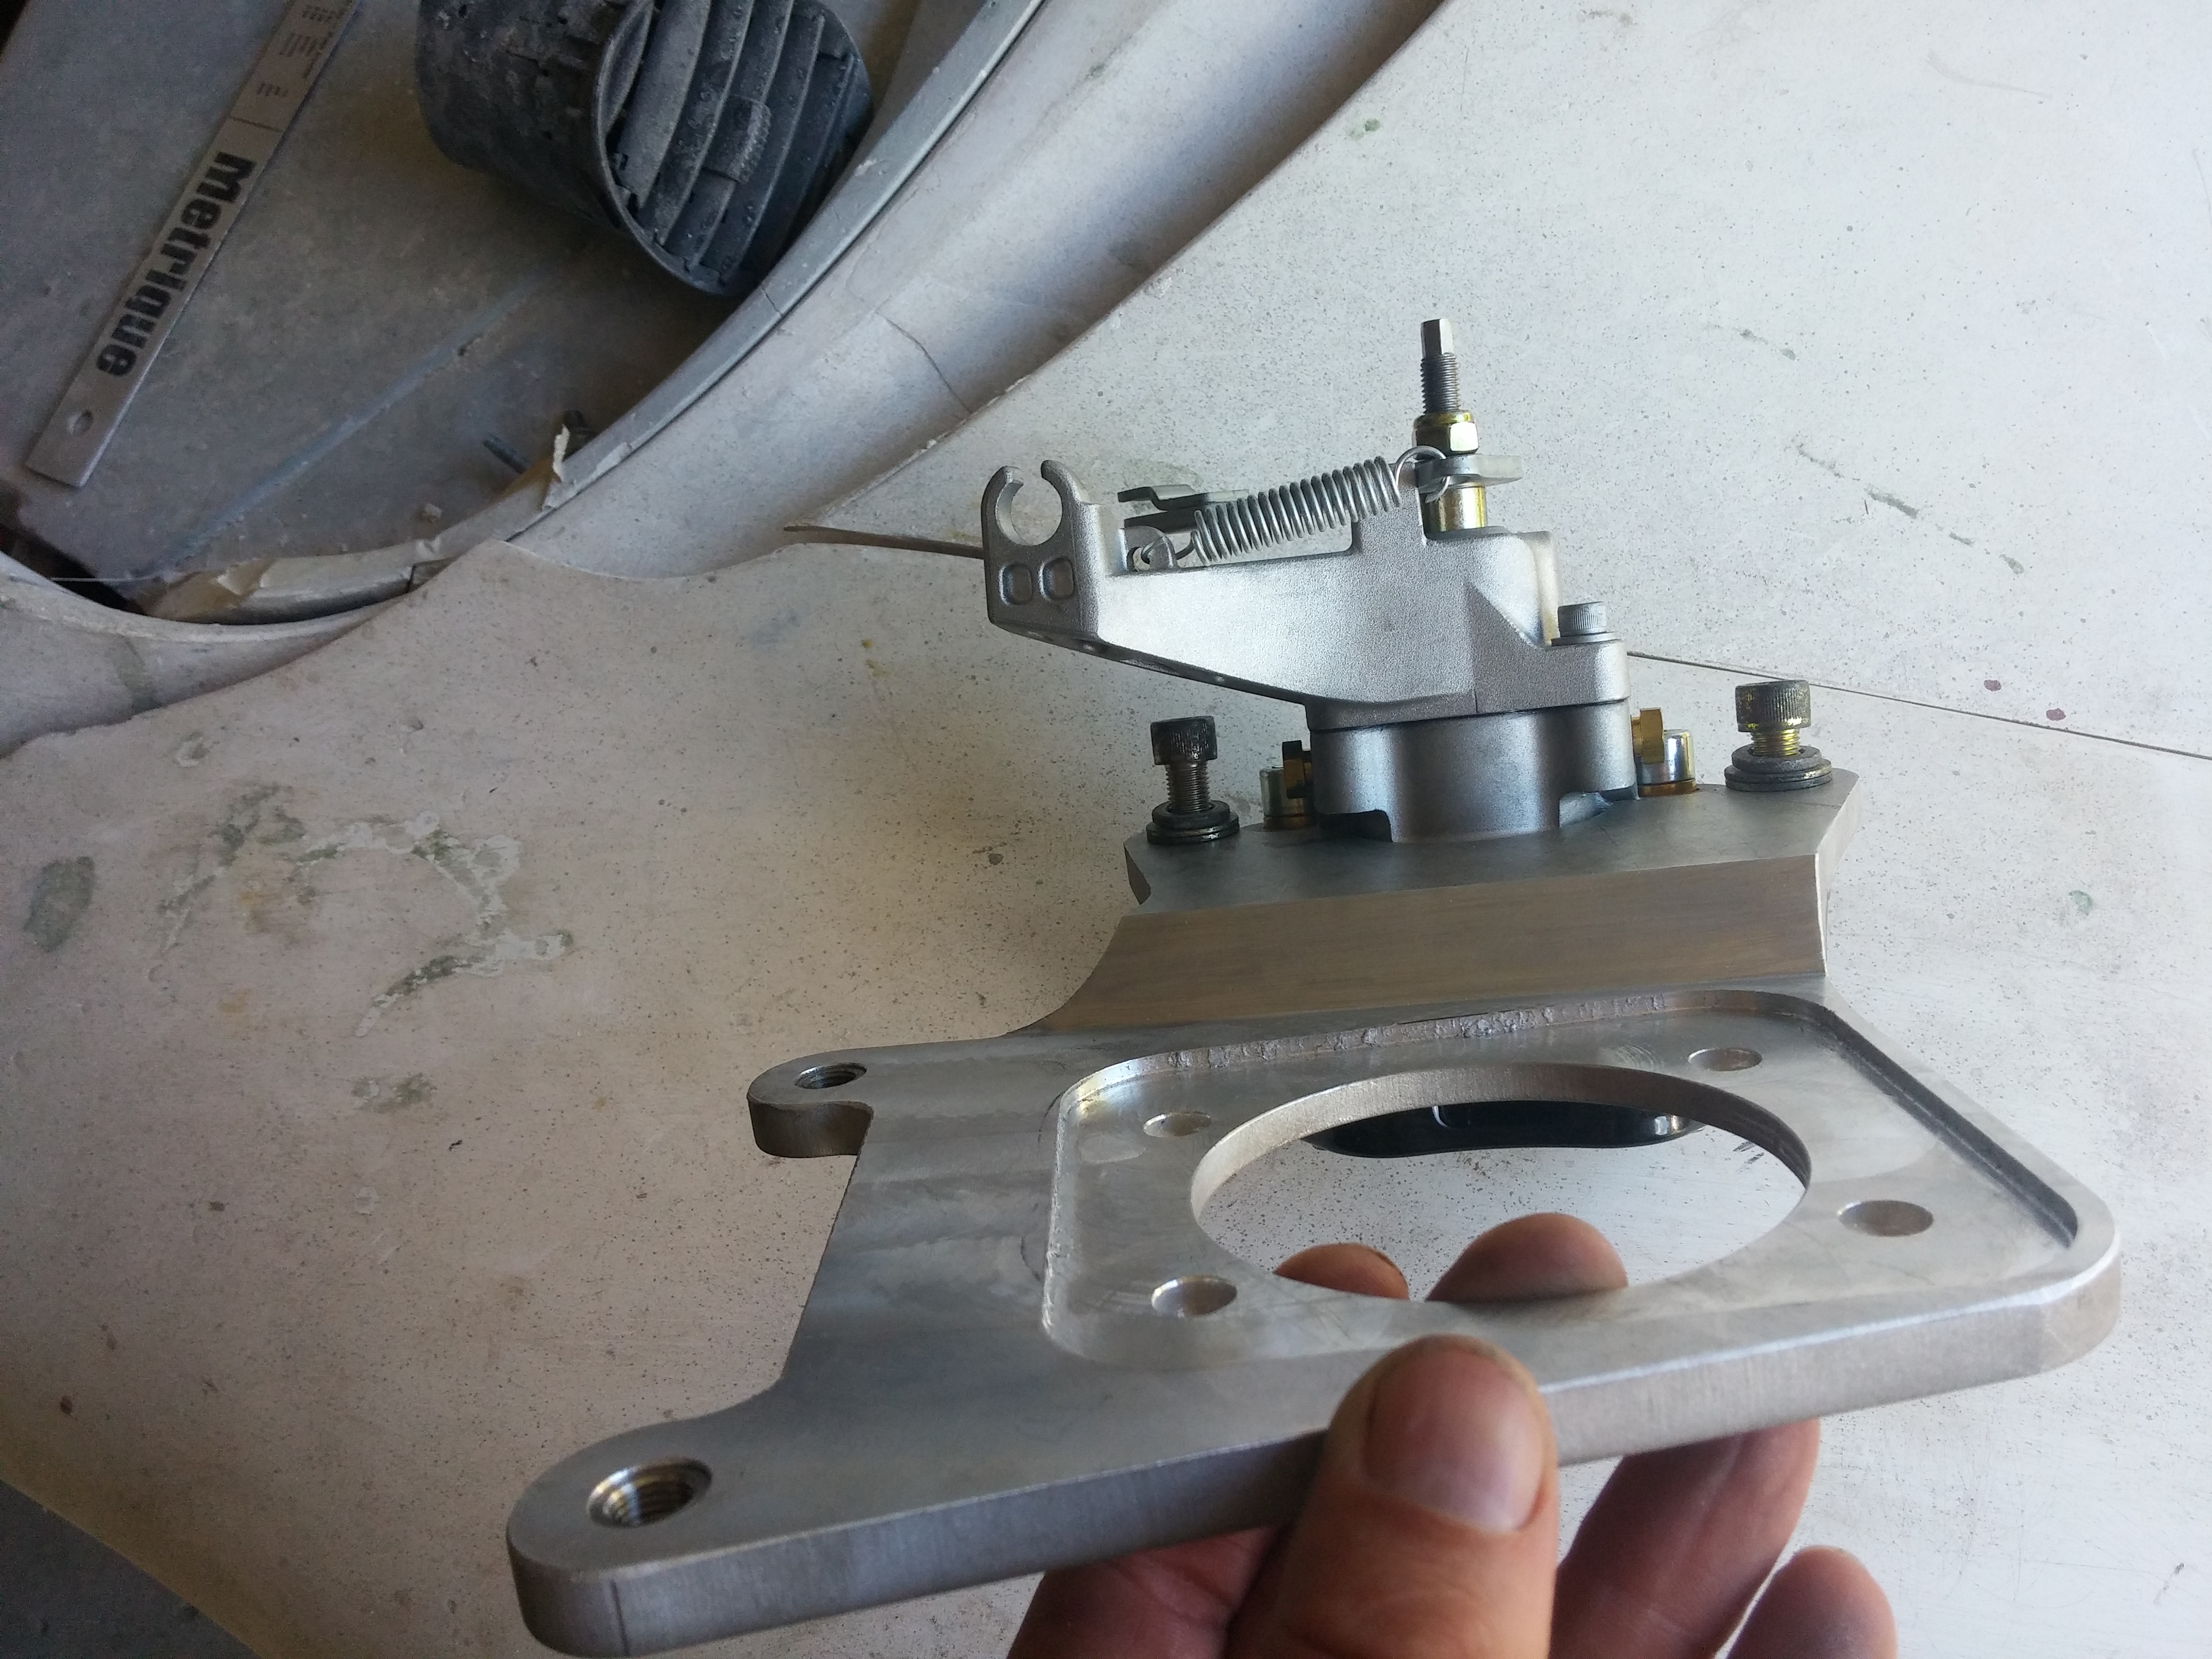
Out from machine shop, needs some polishing and a nice red anodizing dye
to match original color.
There are other setups and not to take them down they are of great design. This
design however though its more involved in manufacturing relies on Wilwood
mounting bracket which has the floating pins as part of it unlike with other designs
the mounting plate is removed and the float pins are threaded directly into the
adapter plate. Our design also prevents the adapter from accidentally stripping
threads for the slider pins and by using the OE mounting plate the calipers can
be much easier taken out and mounted back into the car. Also for anyone that is
using a different hat that possibly may have different offset the mount plate
can be adjusted (moved out) by shimming the mounting plate with spacers if
needed.
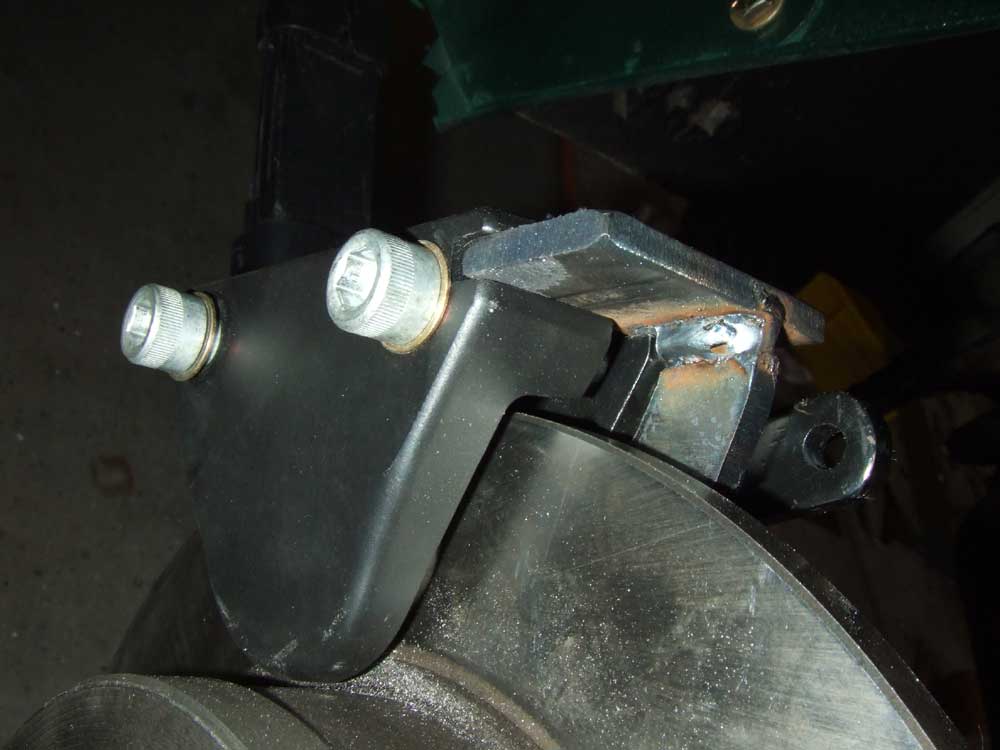
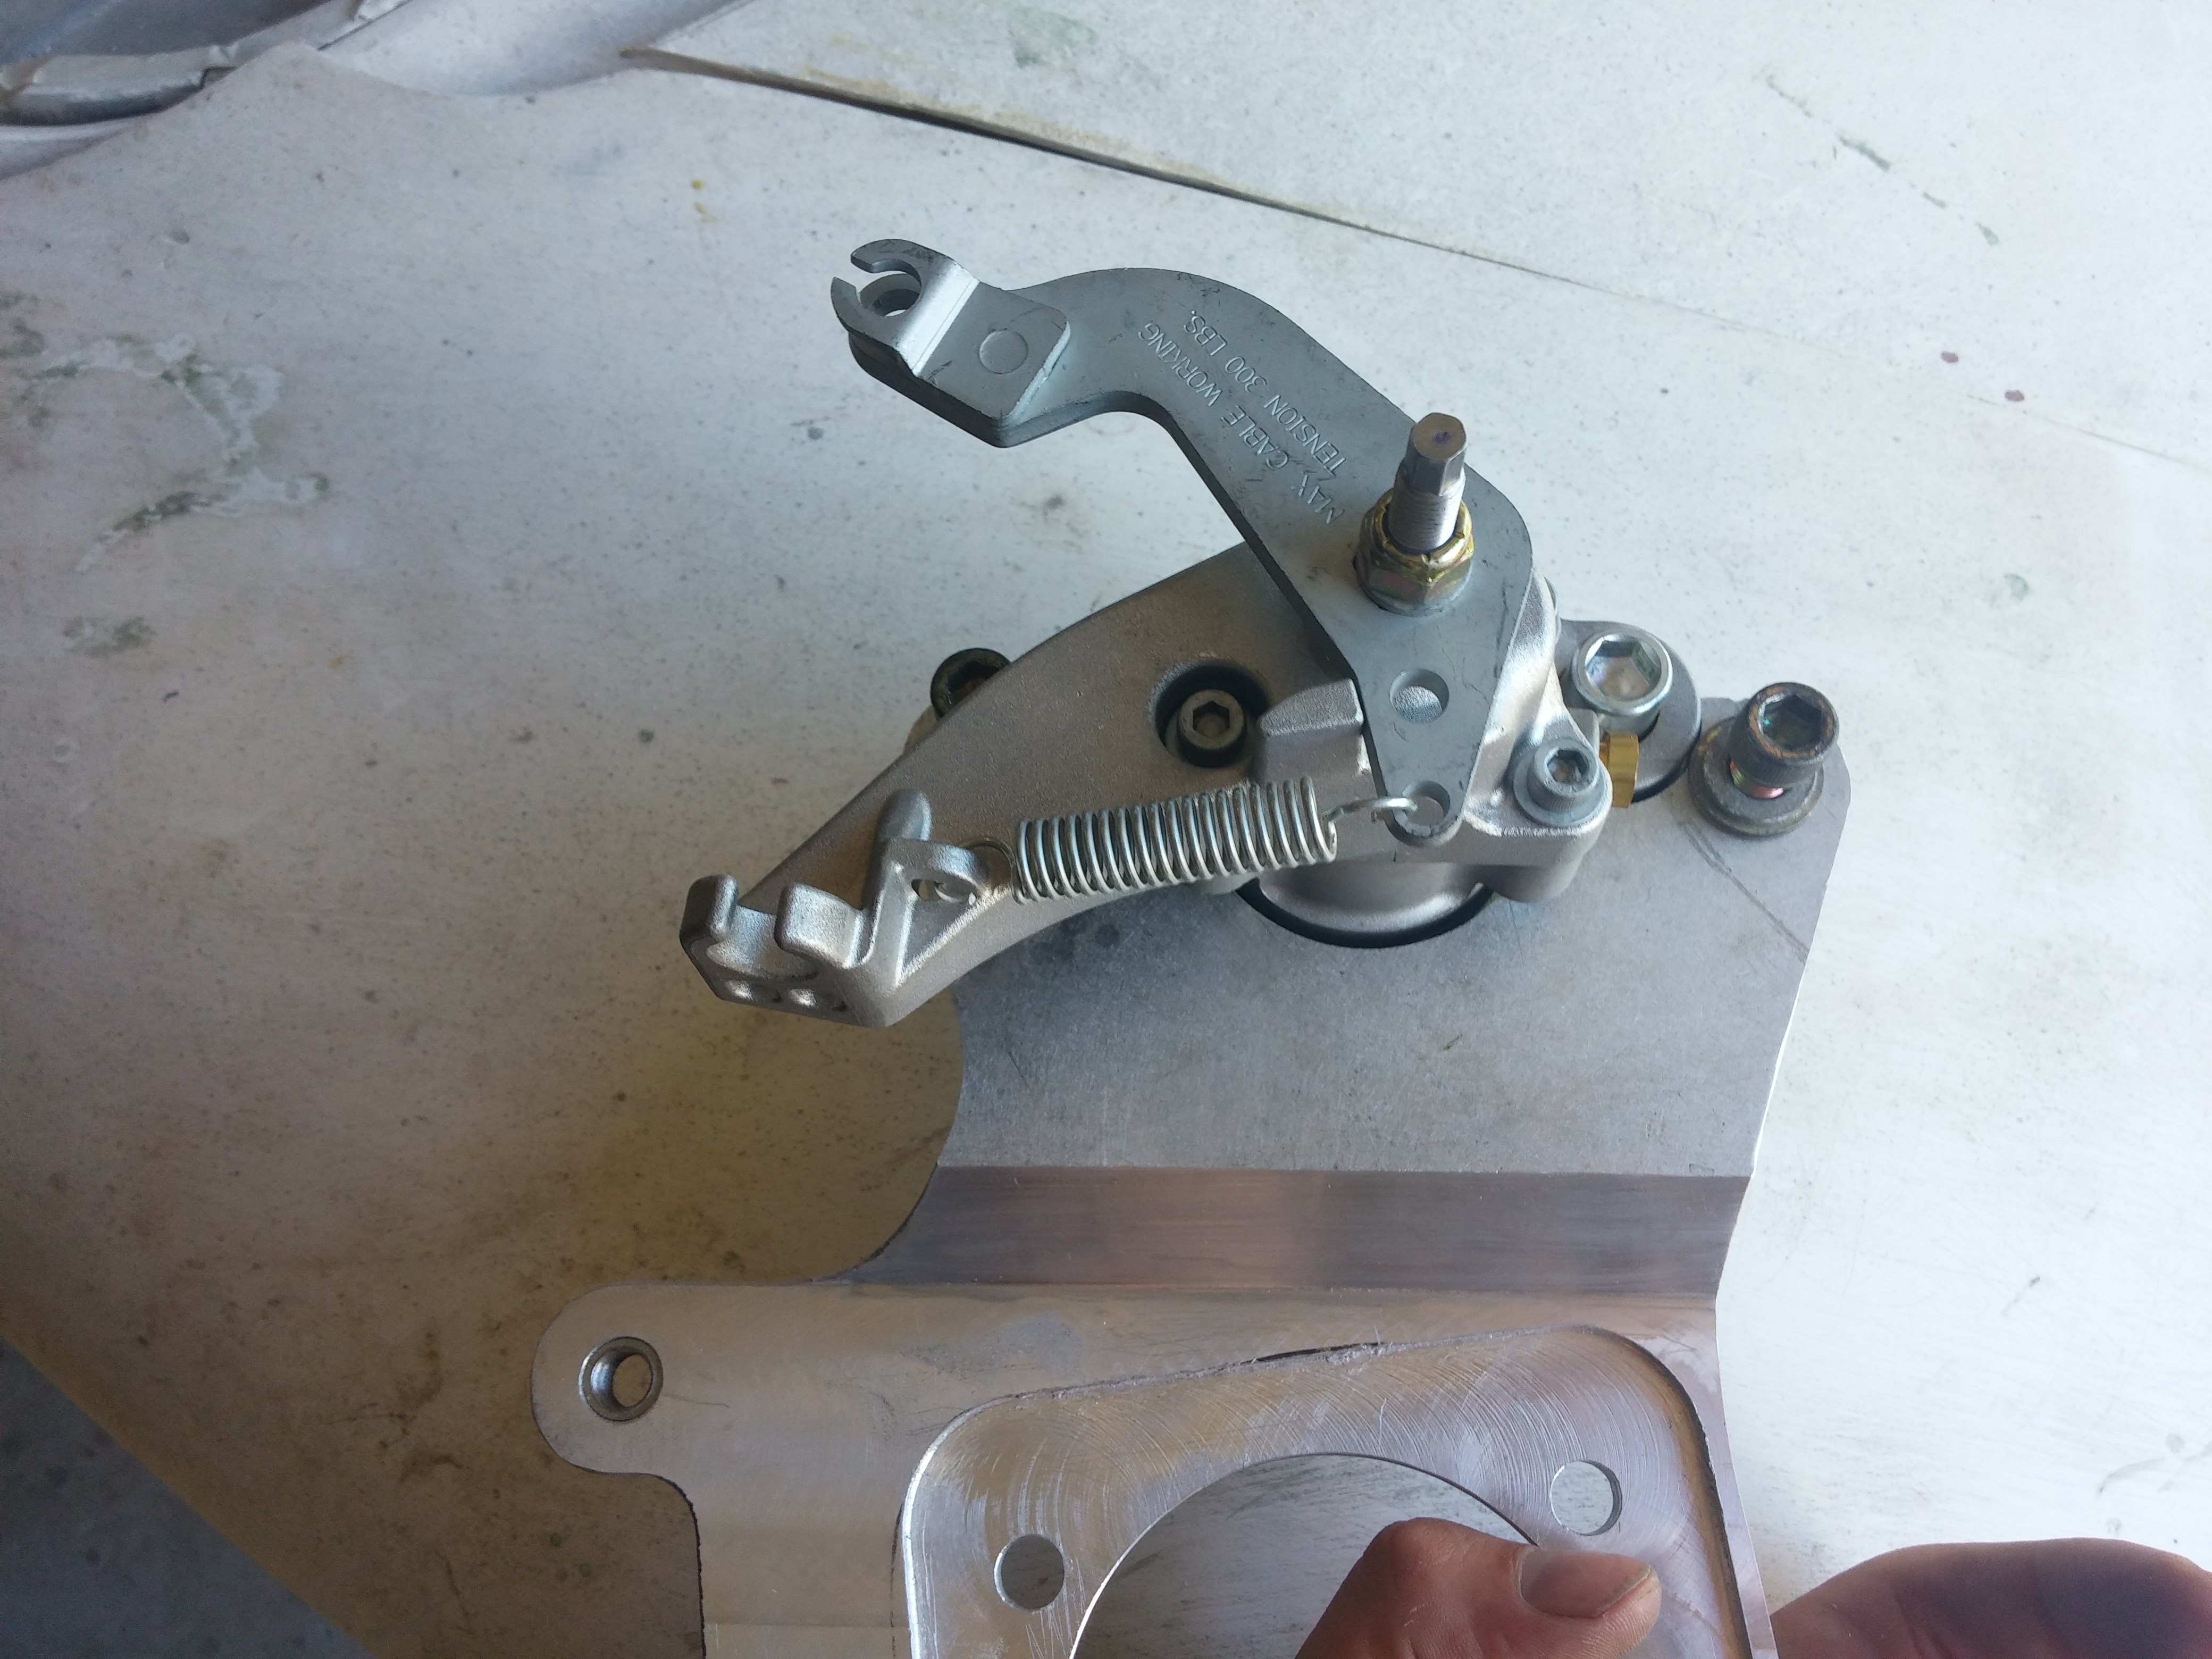
Back view of the adapter plate with MC-4 mounted as to cable mounting
view1 and
view2 mocked up
on the spindle.
-
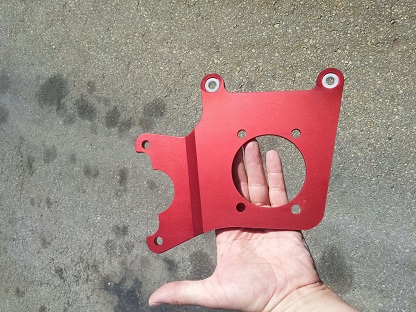
After anodizing this is how they looked. One problem during the process was
discovered that the stainless inserts pressed into the plate where corroded away
during electrolysis / plating plating process as stainless steel has different
electrical properties.
To correct the problem and as they where made by the machine shop, back they
went to have new inserts made and pressed in. Once they where corrected plate
was ready for mounting on the hub for final time so that everything can be
assembled together.
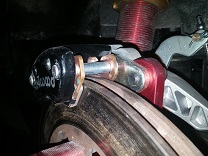
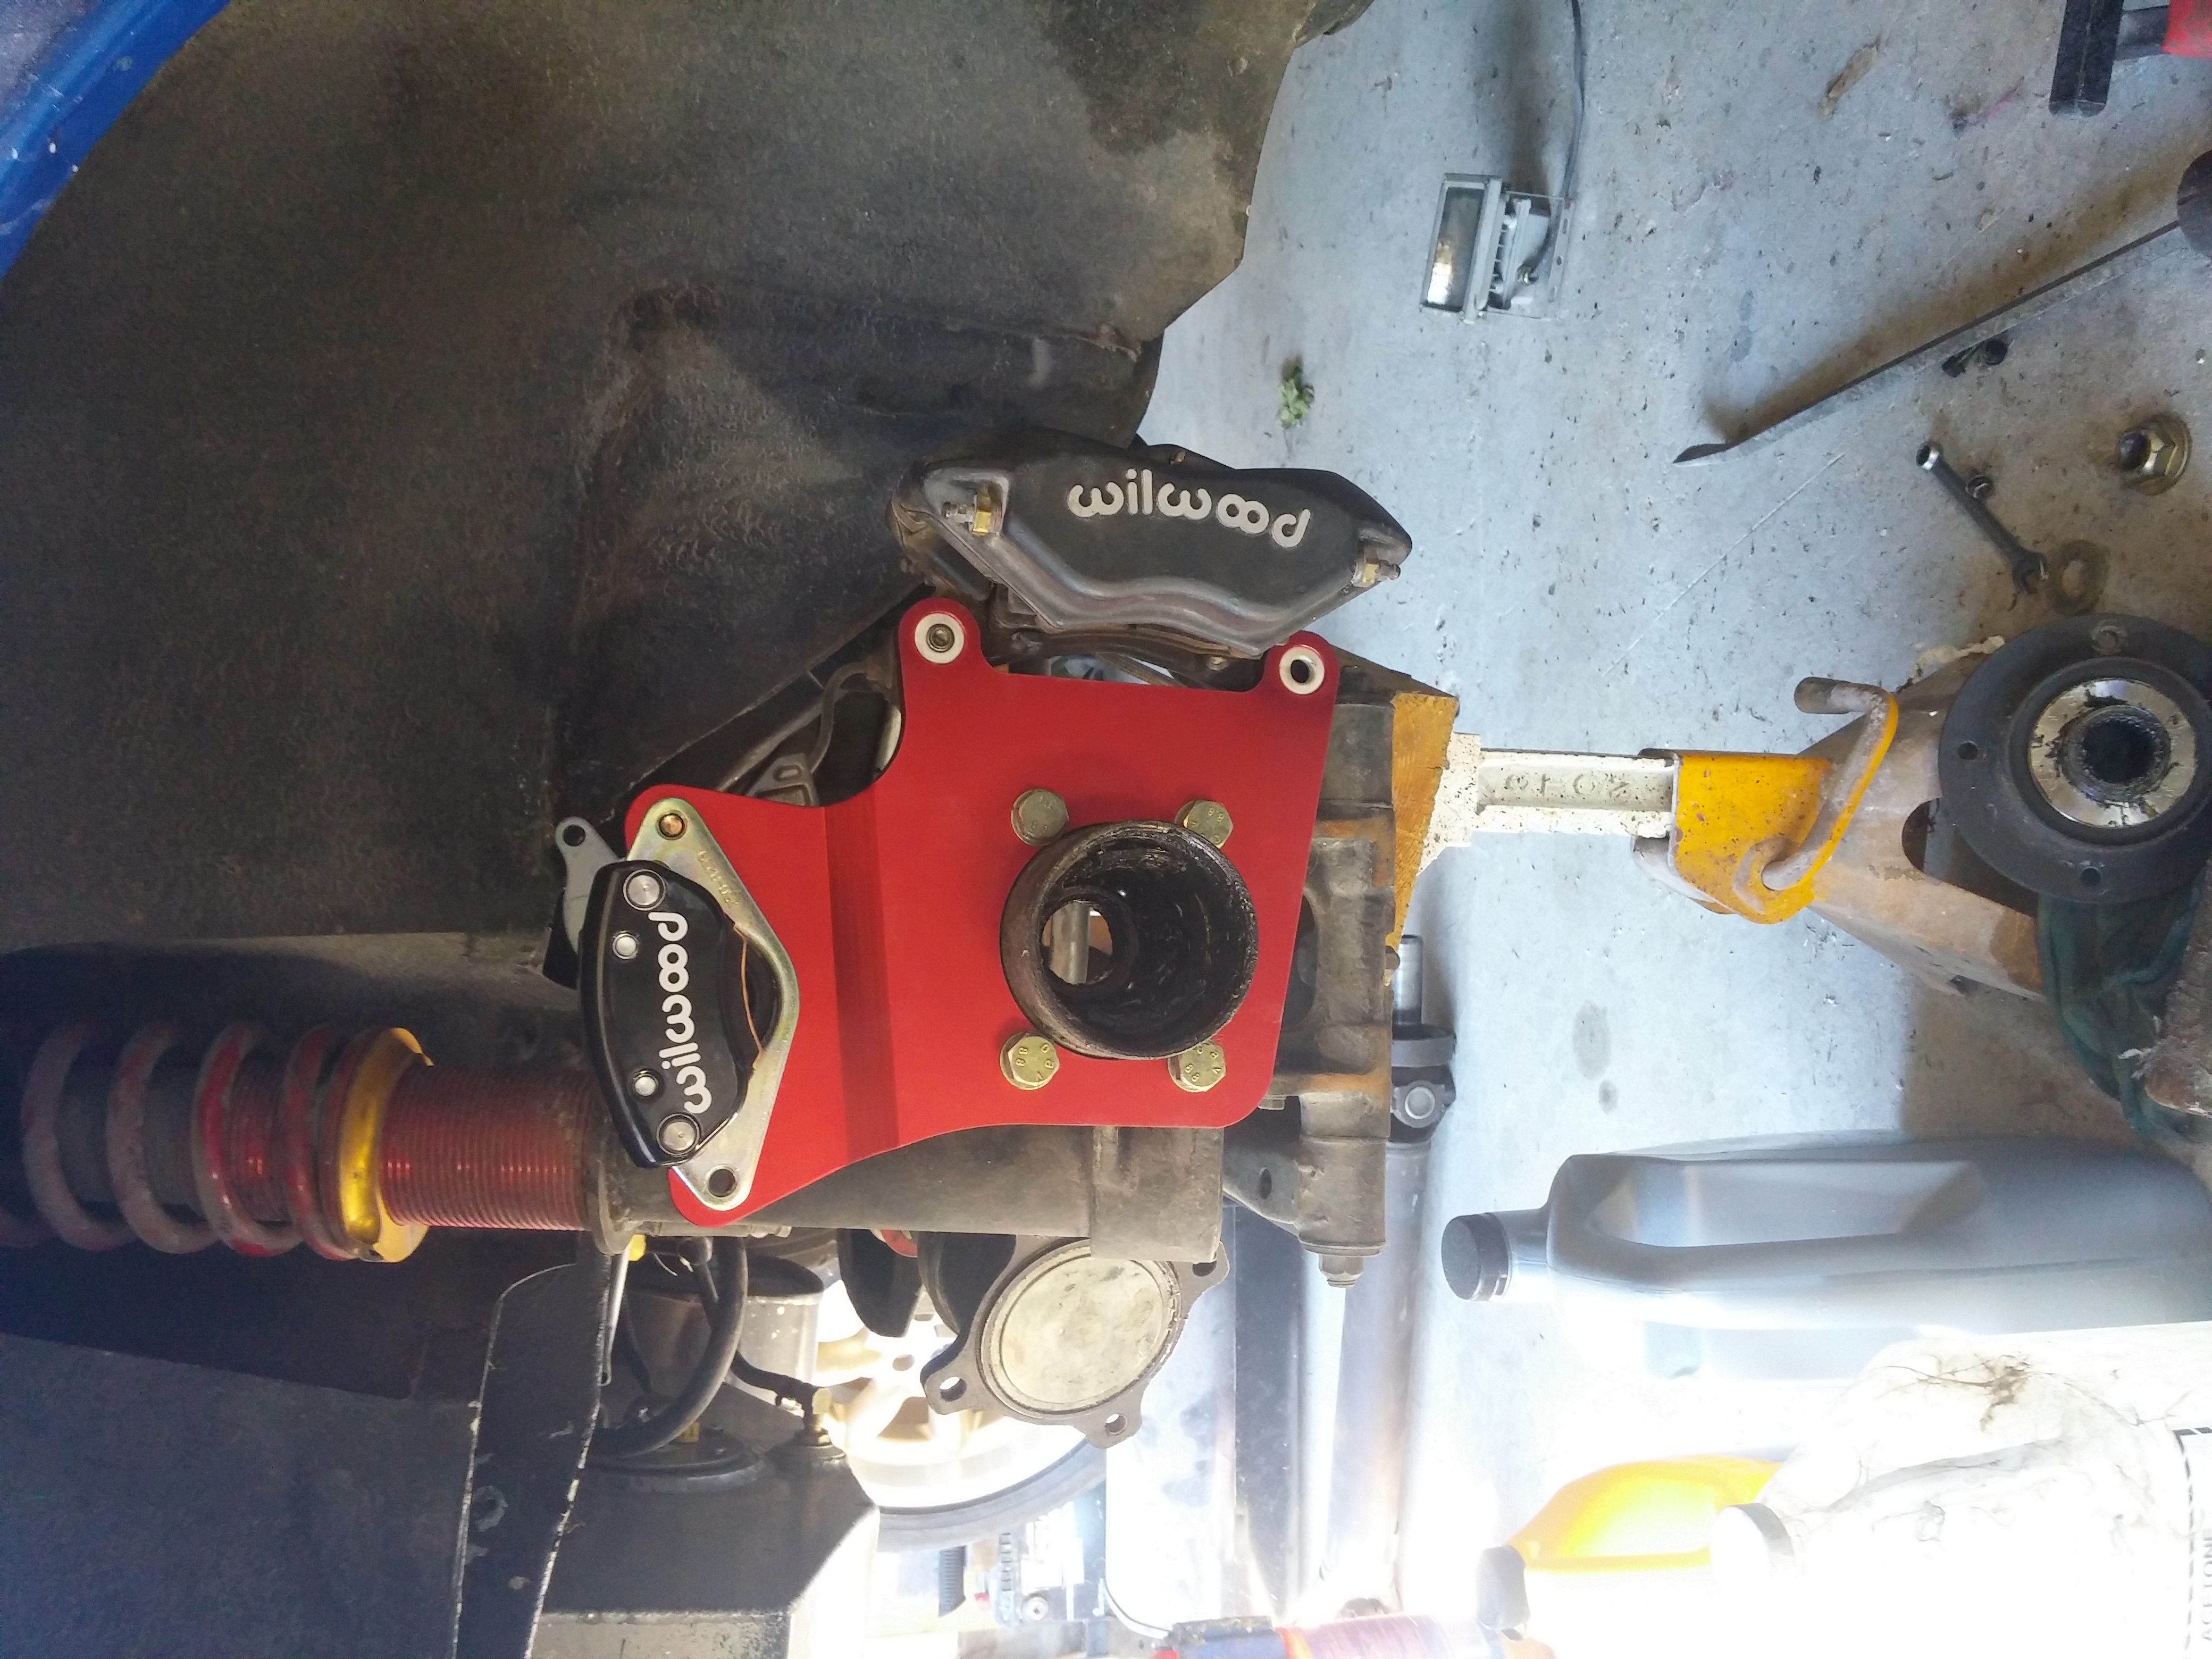
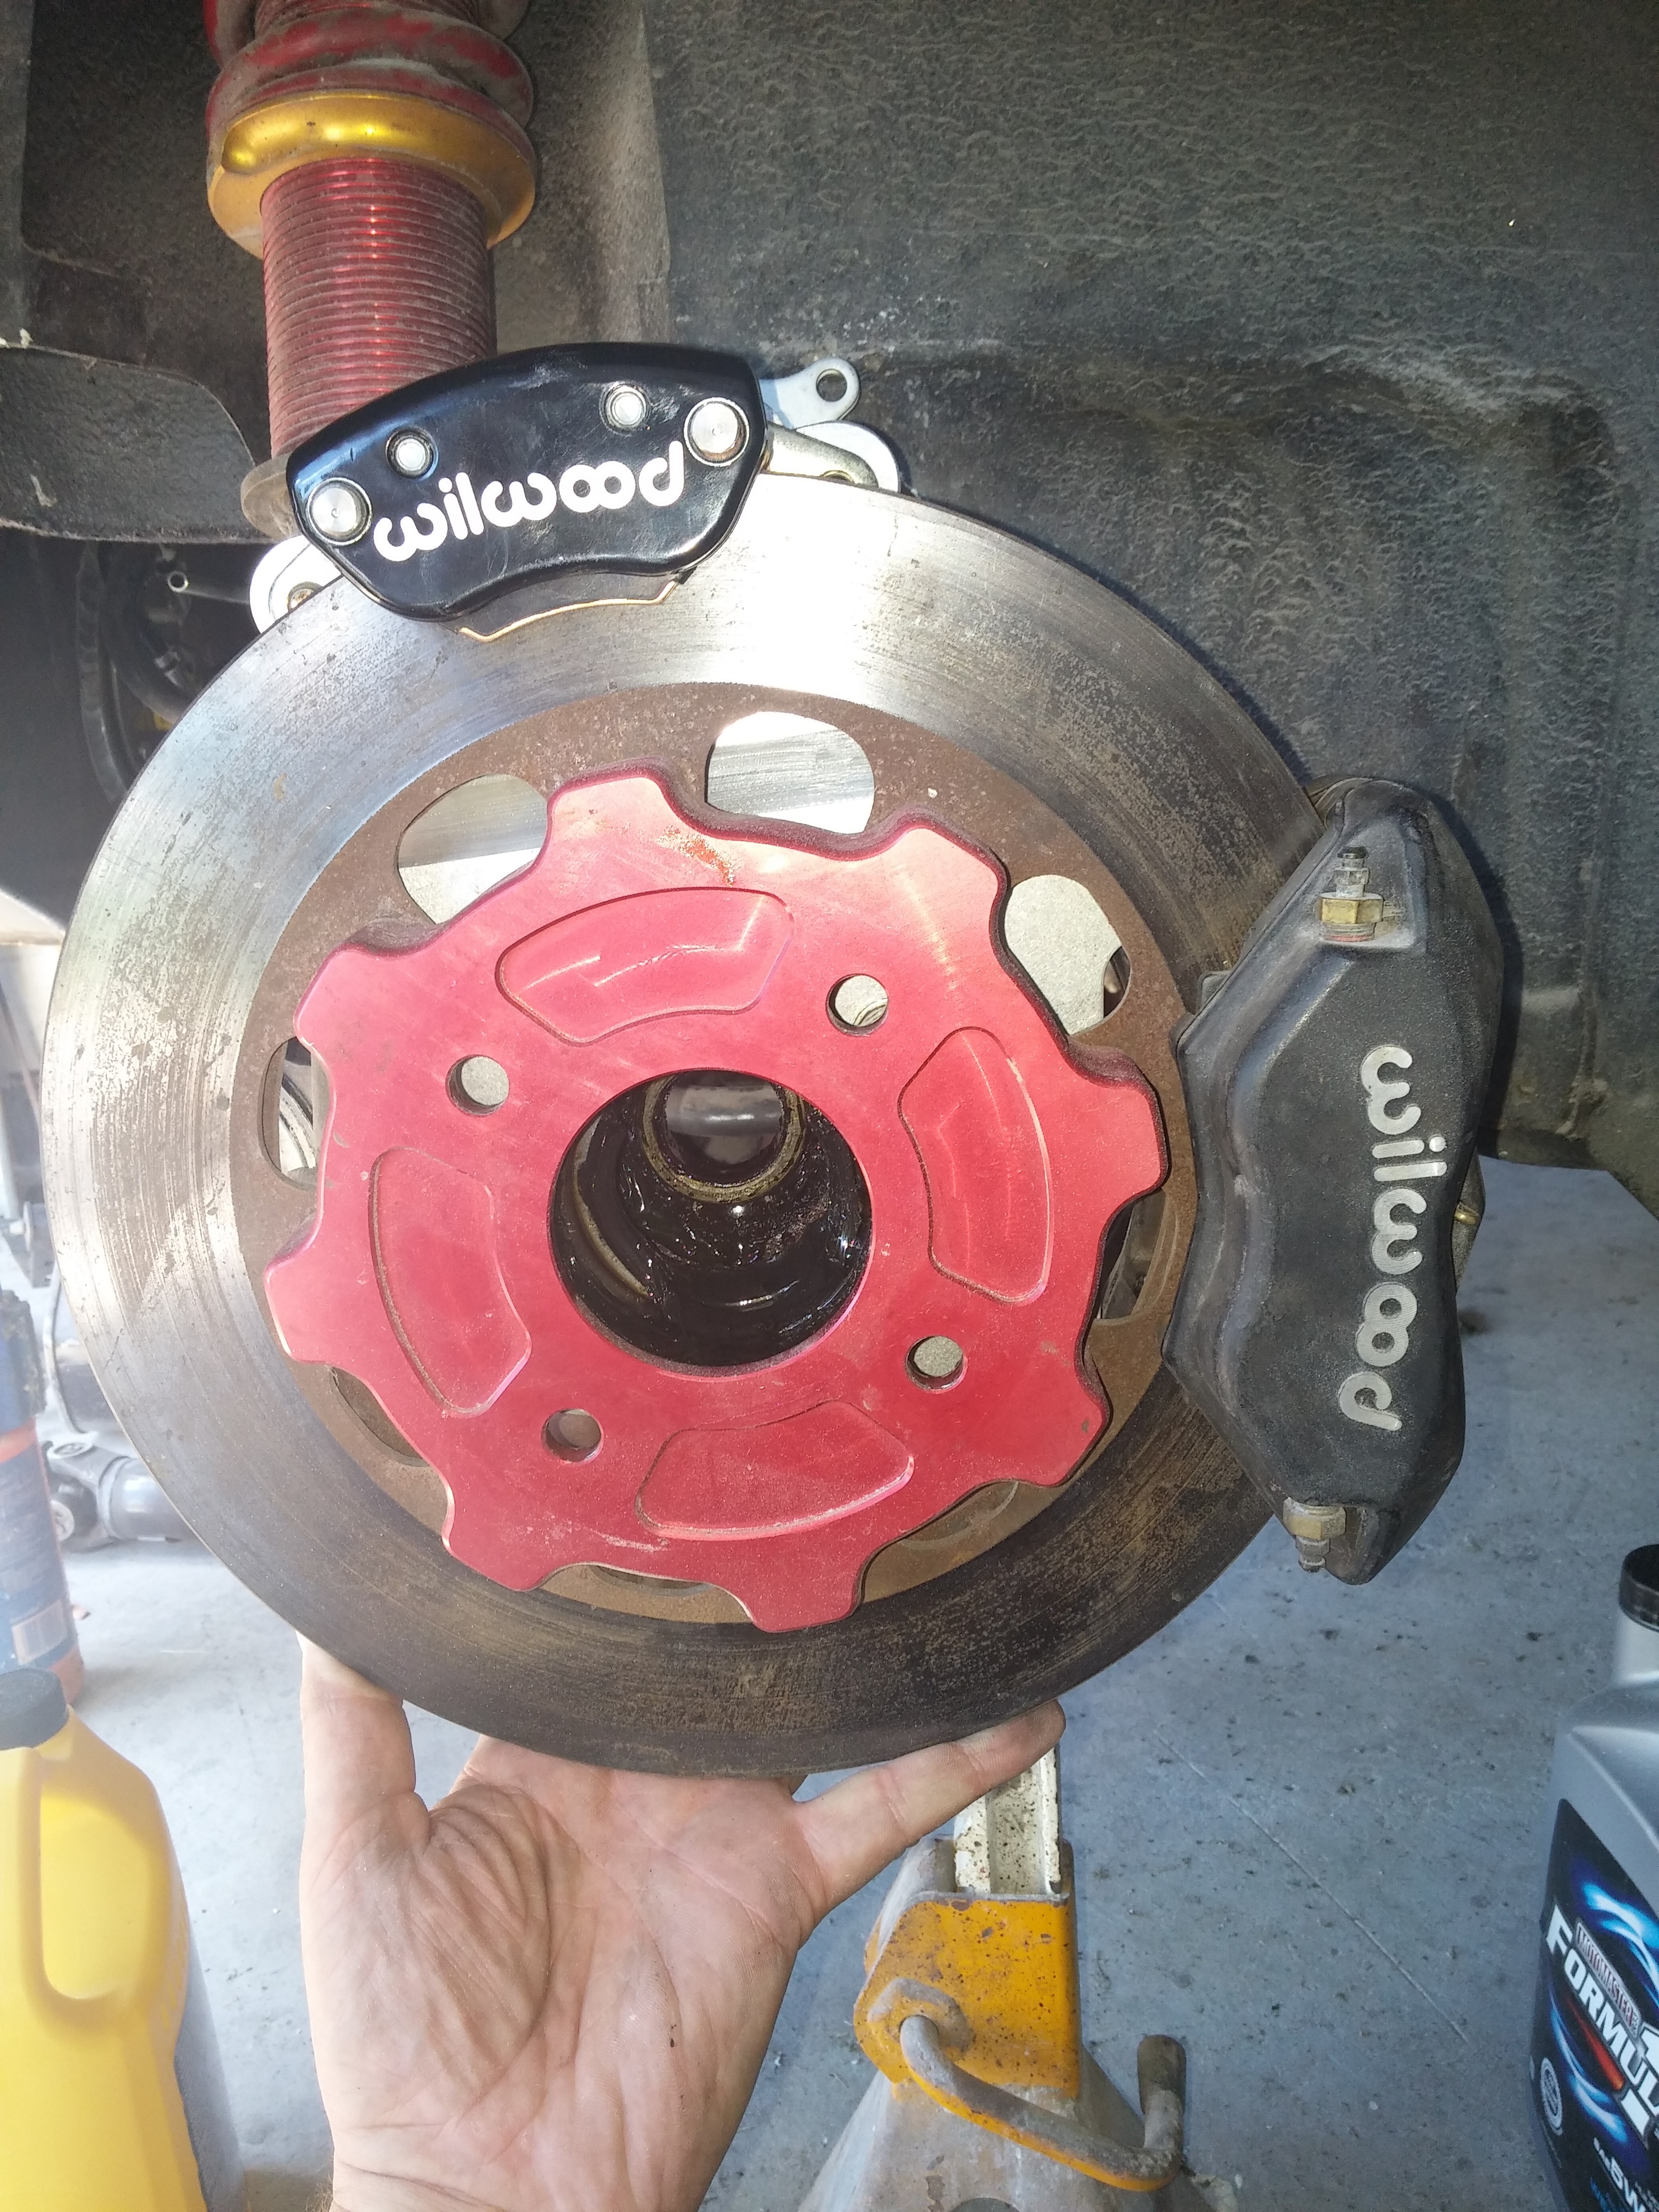
As seen from picture above left. the MC4 caliper was clock'd counter clock wise
so that the adjusting screw be located right in the shock tower so that it would
avoid hitting the body/chassis and avoiding of readjusting it and deforming the
sheet metal and still leaving plenty of clearance for the cable lever.
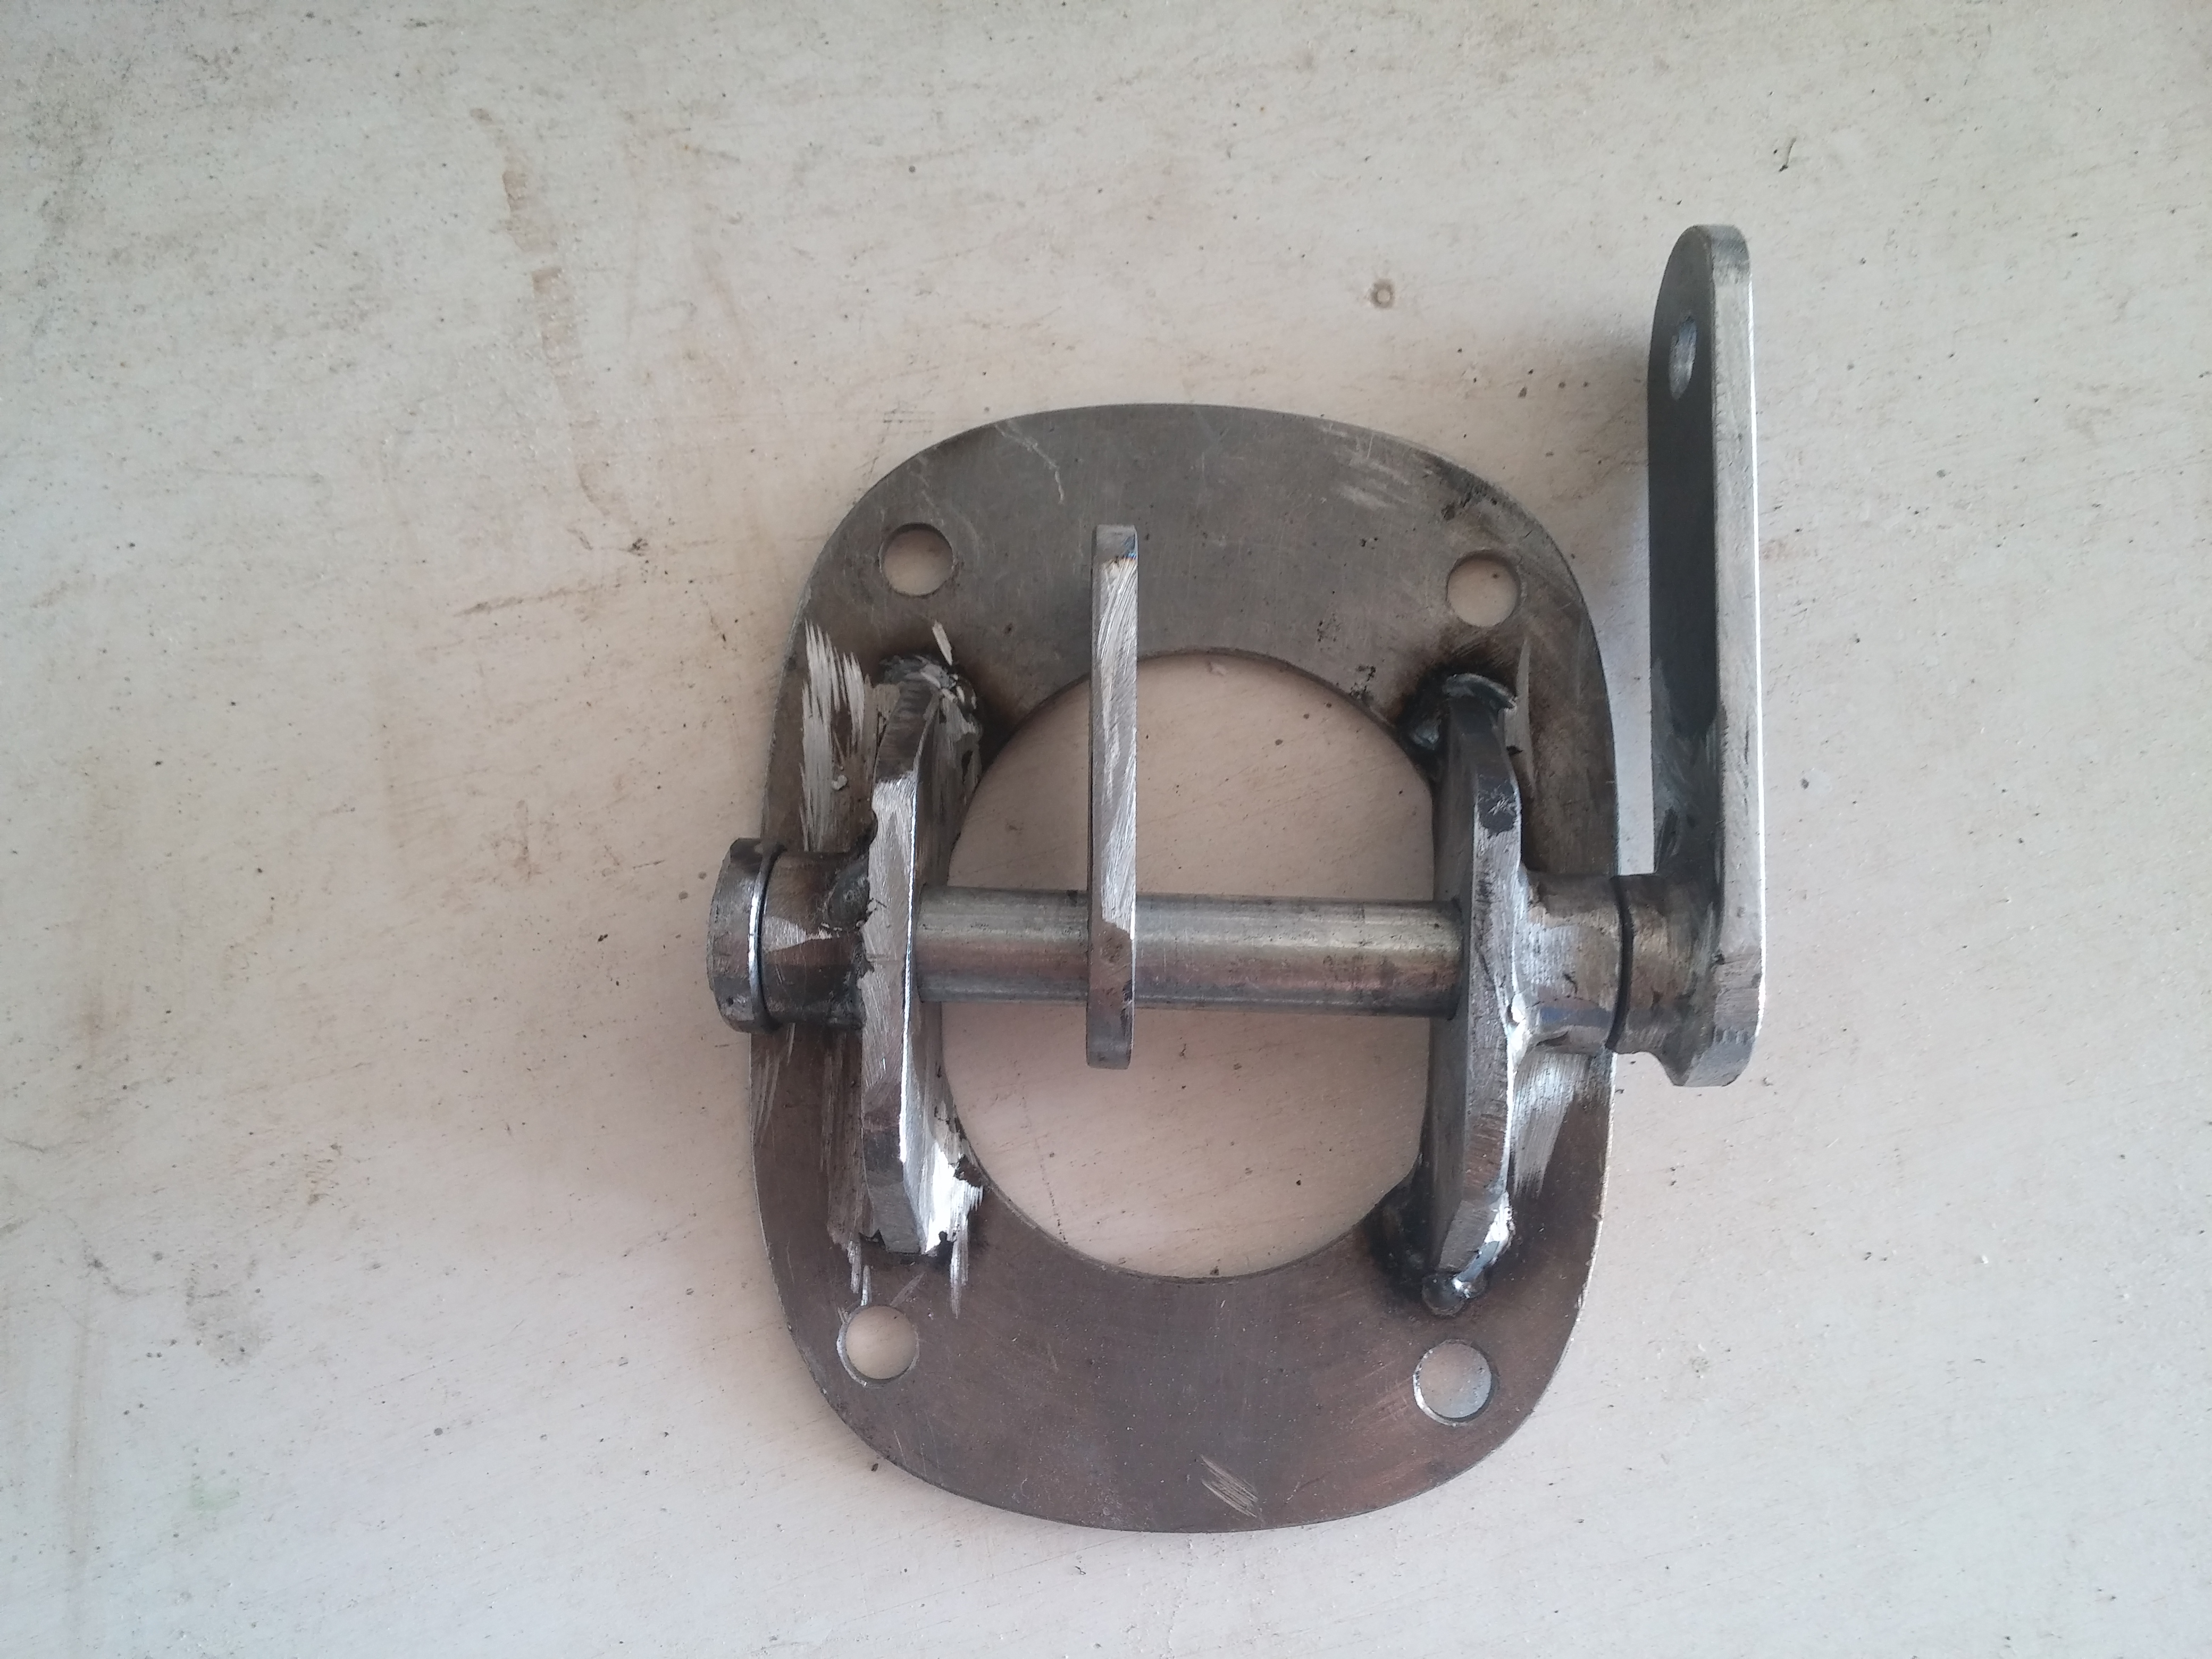
With the handle mounted inside one thing was missing was the cam adapter to
cable pull arm. I had misplaced mine during
 original
restoration rebuild. Rather then trying to locate one and not knowing its
condition, decided to make one as it easy enough part to make. Started
with base for it having bolts protruding through the original nuts I pressed
sheet of paper onto it to get impressions of the exact patterns. Had a shape
drawn around it to be fairly close to original plate with outside and inside
hole cutout and made the plate out of 3/16' mild steel. Next was to make
the 2 vertical pieces for the cam to go through. Just as with the plate had them
cut out from 3/16" plate and welded on 2 nuts after they had been ground to more
round shape to give a nicer look and the plate and nut then where drilled to
1/2". The cam arm it self was made out of 1/2" 6" long bolt that had
smooth shoulder on it. The dead again was ground round and a 5"x1" bar was
welded to it to give the cam look going after. With the base and the 2 vertical
pieces along with the bolt the base plate was welded having the bolt
aligning the 2 vertical pieces
for smooth rotation. Last piece was to make the cable pull arm and as the
assembly would never come apart trim the excess bolt and cap the other end. Once
everything was welded and ground smooth it was
primed and painted with engine
enamel to make it fuel and oil resistant. Some pictures are available <here> original
restoration rebuild. Rather then trying to locate one and not knowing its
condition, decided to make one as it easy enough part to make. Started
with base for it having bolts protruding through the original nuts I pressed
sheet of paper onto it to get impressions of the exact patterns. Had a shape
drawn around it to be fairly close to original plate with outside and inside
hole cutout and made the plate out of 3/16' mild steel. Next was to make
the 2 vertical pieces for the cam to go through. Just as with the plate had them
cut out from 3/16" plate and welded on 2 nuts after they had been ground to more
round shape to give a nicer look and the plate and nut then where drilled to
1/2". The cam arm it self was made out of 1/2" 6" long bolt that had
smooth shoulder on it. The dead again was ground round and a 5"x1" bar was
welded to it to give the cam look going after. With the base and the 2 vertical
pieces along with the bolt the base plate was welded having the bolt
aligning the 2 vertical pieces
for smooth rotation. Last piece was to make the cable pull arm and as the
assembly would never come apart trim the excess bolt and cap the other end. Once
everything was welded and ground smooth it was
primed and painted with engine
enamel to make it fuel and oil resistant. Some pictures are available <here>
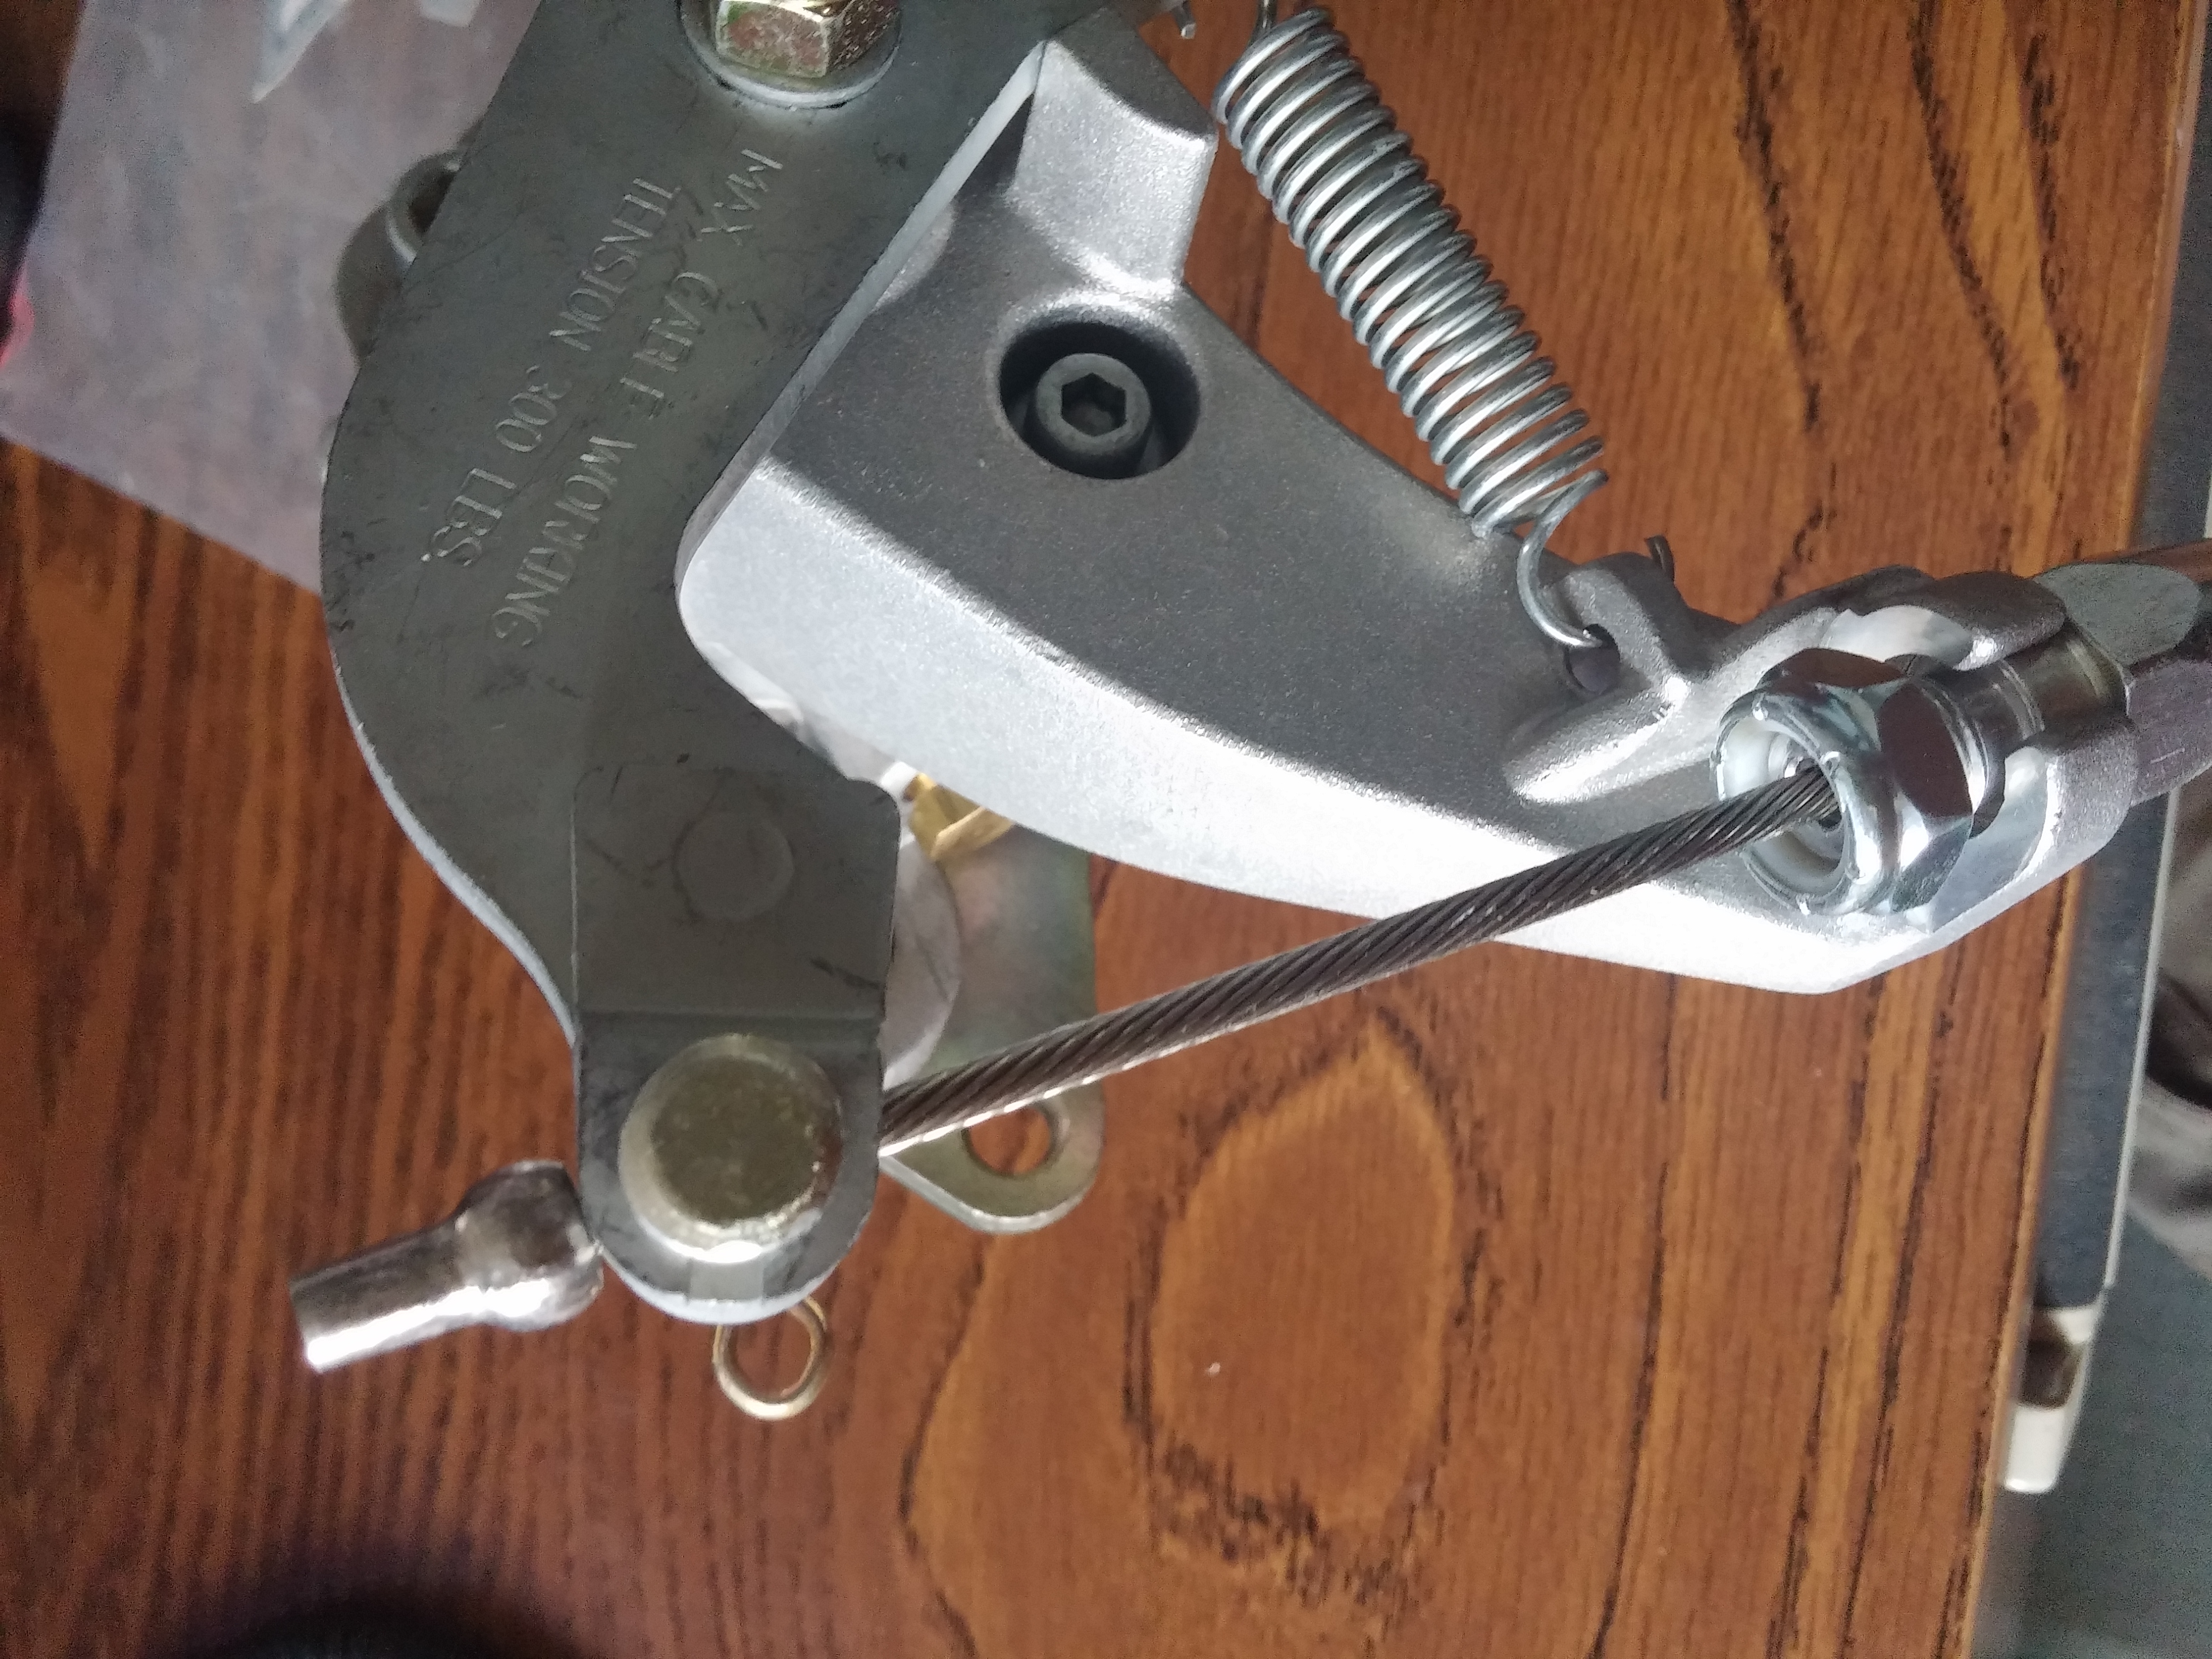
Last thing to do was to connect the calipers with the Cam Arm and to do that
a Lokar EC-80WTU universal brake cable
 was
used. It comes as a kit with 2 8 foot cables and hardware out of which its only
42" that's needed to interconnect the 2 and that still leaves the cables hanging
very long around control arms and under carriage. was
used. It comes as a kit with 2 8 foot cables and hardware out of which its only
42" that's needed to interconnect the 2 and that still leaves the cables hanging
very long around control arms and under carriage.
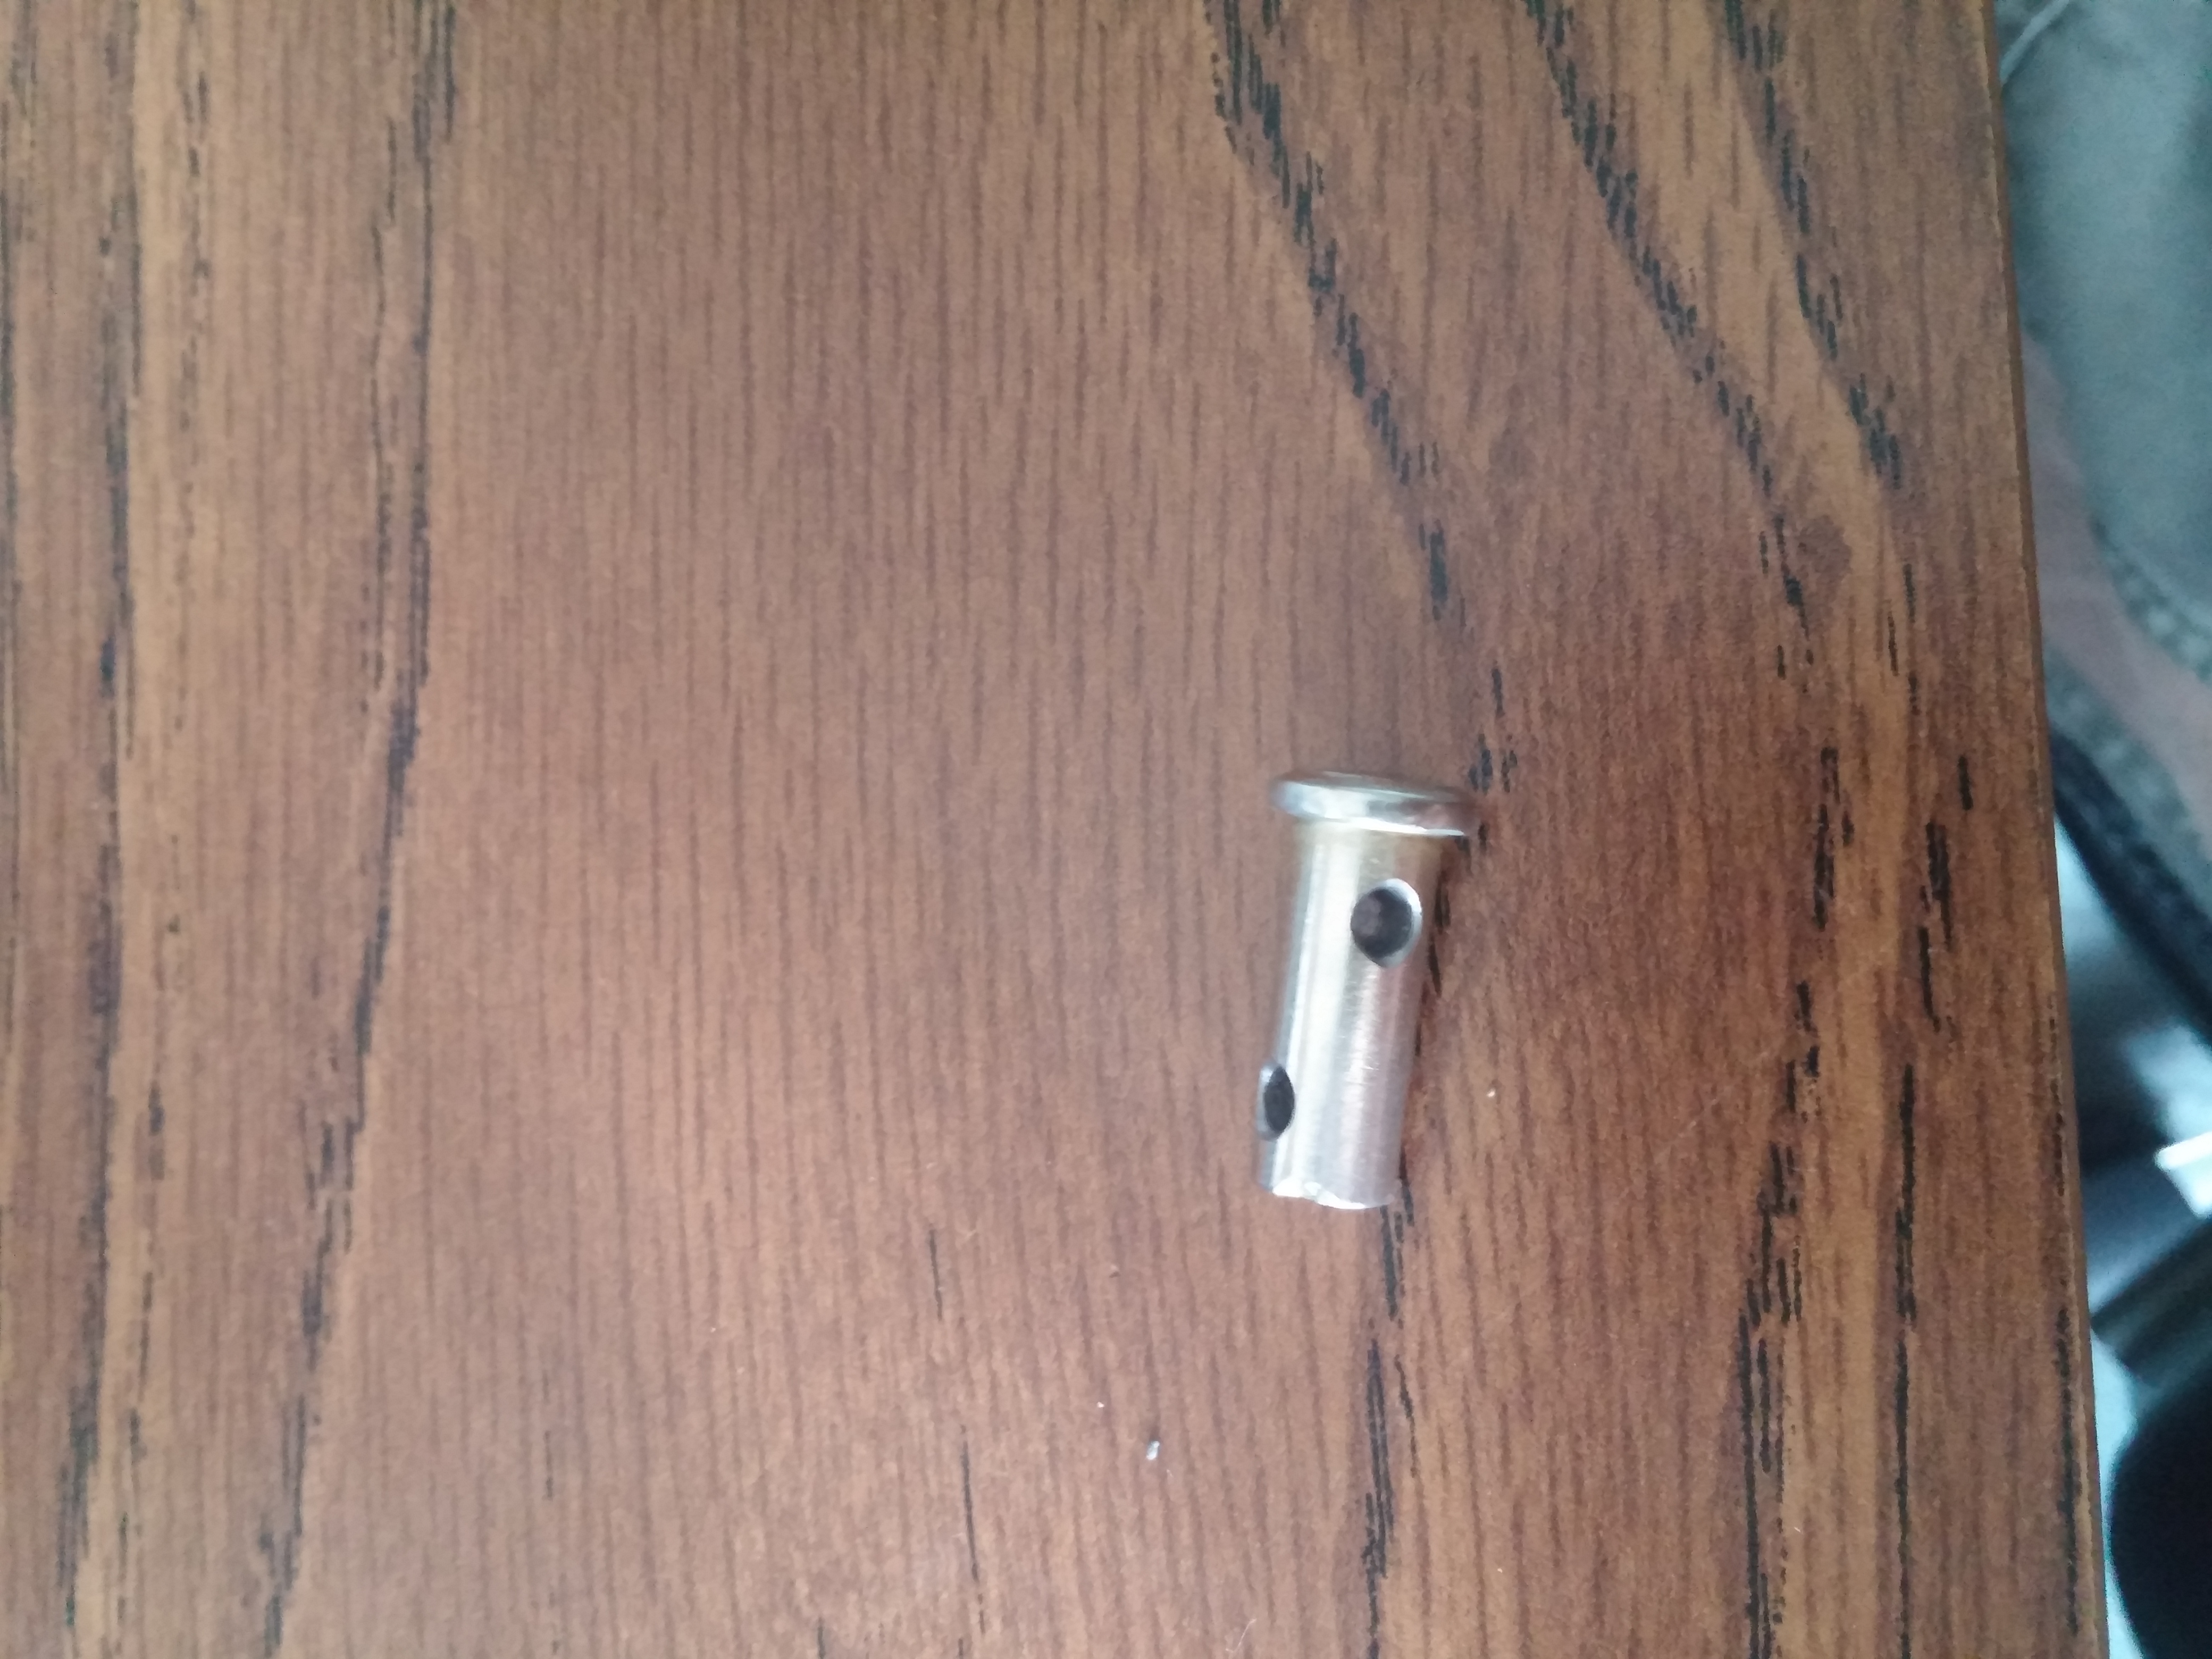
One thing about the cable is that its universal kit so you are pretty much have
to adapt it to your needs. Secondly the cable has a ball crimp on caliper end
and the MC4 arm has a swivel barrow type mount for it for easy removal of the
cable. Unfortunately Lokar does not have a barrow type end for it and their
solution is to put a pin through the opening
then thread the cable through the pin then into the sheathing of the cable and
then cotter pin to make sure not that it will keep the pin inside. Not really
the ideal way to mount the cable and if the caliper needs to be replaced for any
reason the cam arm on the caliper needs to be removed then reinstalled when
replacing with new caliper. I'll keep on looking for a different
cable with end that fits right into the MC-4 and not using the pin.
Over all the process and entire exercise of having working not rattling caliper
was well worth it. One thing that needs to be changed on the adapter is
moving the mounting holes for the MC4 caliper closer to the center to give that
extra clearance for some wheels that may be machined differently. There is 4.5mm
clearance from the slider pins to the rotor moving it by 3mm closer may give a
better pad surface grip and give that extra clearance to some rims.
One observation, aluminum is very light material, one problem making this
bracket from aluminum is that you will need NON crushing nut inserts
because hat has to be on opposite side of the bracket where the caliper is
mounted to so that the insert does not get pulled out. Its not a very big
piece so the weight should not be much of an issue of having the adapter
machined from mild steel or any one daring out of stainless but stainless will
come at a price, This will allow for just making a hole in the bracket and
tapping it and forgoing with the nut insert.
Gallery of all pictures can be found < here >
PDF profile model of right
side
with <front> and <side
> view of the flange.
Original version 1.0 AutoCAD file adapter
plate.
An updated v2.0 PDF file with closer / smaller gap between sliding pin and rotor are
found <here> and
AutoCAD file
|


